
Canning Diced Green Chiles (& Other Peppers)
Looking for a homemade version of those canned diced green chiles that you buy in the store? Here’s how you make them!
You can also use these same directions to can any type of pepper – whether they are hot or sweet.

Near the end of late summer, we always have more peppers than we know what to do with. (Peppers are so easy and fun to grow, we always plant too many!)
We freeze sweet peppers in strips or halves to use later in the year, dry some diced pepper pieces, make our own cayenne, red pepper flakes, paprika and other such powdered spices, make hot sauce, pickled peppers, AND these handy little cans of diced green chiles.

Pepper Varieties
You can use any variety of pepper from your garden, but if you want to hit pretty close to the heat level of store-bought mild chopped green chiles, some good choices include:
- Anaheim – 500 to 2,500 Scoville Heat Units
- Poblano – 1,000 to 2,000 Scoville Heat Units
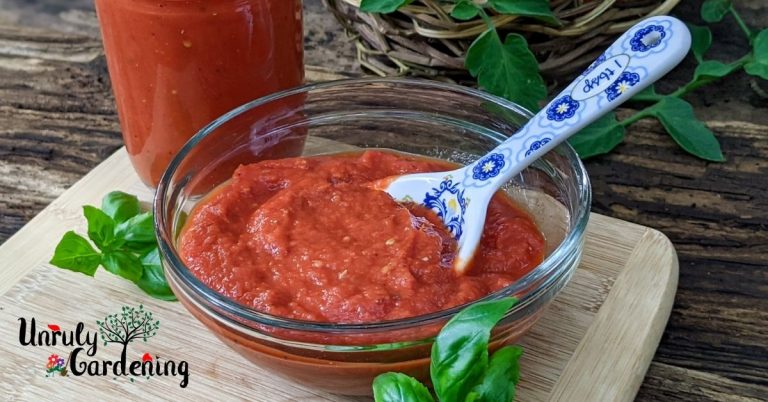
For this batch shown, I used pepperoncini peppers (which are even milder at around 100 to 500 Scoville Heat Units). Most of the ones I canned were green, but some were red too. (Both colors taste the same to me when canned, at least going by my personal taste tests!)
Pepperoncini are milder than commercial diced canned chiles, but they still work great in stir fries and my favorite veggie beef soup recipe.

How Many Peppers Do You Need?
The National Center for Home Food Preservation says that an average of 9 pounds of peppers is needed for a canner load of 9 pints. I like to can diced green chiles in 4 ounce jars, to mimic the store-bought size, so going by their numbers, 9 pounds of peppers would yield me about 36 four-ounce jars.
That’s a little bit more peppers than I want to work with at one time! Instead, I’ve found that about 4 1/2 to 5 pounds of peppers is a good amount to handle in one go and will usually fill around 28 four-ounce jars, which is two pressure canner fulls.
Canning Tip: Have a couple extra 8 ounce jars handy, just in case you end up with too many chopped peppers and need to fill a couple of bigger jars to use them up. (Alternatively, you could freeze any extras that didn’t fit into jars.)

Time Needed
With my hubby and I working together, it takes about 45 minutes to an hour to core and de-seed about 5 pounds of peppers. (Be sure to wear gloves if they are hot peppers!)
Add in another 1 1/2 to 2 hours to roast the peppers on the grill, peel them (if they are thick-walled; you can’t really peel the thin-walled peppers), chop or dice them, and fill the jars.
Then there’s the 10 minutes of letting stem escape, plus 35 minutes processing time. It’s smart to cleanup as you go, but you’ll still need time for a final kitchen cleanup too.
So plan for around a 4 hour project, maybe a little longer if this is the first time you’re canning peppers.

Preparing the Peppers
Some types of peppers have thick skins that need to be removed before canning. If you’re working with very thin walled peppers, you can go ahead and blister them using these same directions, but removing the skin might also remove three-fourths of your pepper meat!
No worries – you don’t have to peel these types of very thin-skinned peppers. Instead, we just chop them up and proceed. But we do still char them, because that really boosts the flavor!
Thick-skinned peppers such as Anaheim or Poblano really should have the skins removed for an overall better quality product.

To Remove Pepper Skins:
You have a few choices when it comes to roasting the peppers, which makes peeling off the skin a lot easier.
The one we use is the grill method: Heat the grill to medium to medium-high. Lay the cored/seeded peppers directly on the grates, or on a piece of foil. Turn the peppers frequently for several minutes as they roast.
Alternatively, you can broil the peppers in a 400 degree F oven for 6 to 8 minutes, turning several times, until the skins start blistering.

Cooling:
Once the peppers are roasted, remove them to a large heat-proof bowl while they’re still piping hot and immediately cover them with a towel until they’re cool enough to handle. The resulting steam will make it easier to peel the skins off.

Chopping:
Wearing gloves, use a pair of clean, sharp scissors or a knife to chop the peppers into small diced pieces.
Once all of the peppers are chopped, you’re ready for canning!

Pressure Canning the Peppers
Before you begin, make sure you have jars, lids, rings, a skewer or chopstick, a large pot of boiling water, salt, a jar lifter, and a couple of towels on your counter.
Either run the jars through a dishwasher to keep them hot, or set them down into the pressure canner while it’s heating up on the stove. (Just make sure you don’t start with cold jars, they need to be hot so they won’t break when you’re filling them.)
Fill your pressure canner with the required amount of water (for our canners, that’s 3 quarts), plus add a tablespoon or two of white vinegar if you have hard water like we do and want to avoid mineral deposits. Set it over a medium burner to start heating while you fill the jars.

Fill the Jars
Spoon enough diced peppers into the hot jar to the one inch fill line. (This is usually the lowest raised ring on the top of a jar.)
Add the salt, if you haven’t already, then pour in enough boiling water to reach that one inch fill line. Adjust pepper and/or water amount as needed, to maintain that 1 inch headspace. Gently run a skewer or chopstick along each side of the jar to help remove air bubbles.

Salt ratios to know for canned peppers:
You can either add salt to each jar before filling (helpful if you’re forgetful like me!) or you can add salt once you’ve filled each jar. Your choice!
- 1/2 teaspoon salt per each pint jar (16 oz jar)
- 1/4 teaspoon salt per each half-pint jar (8 oz jar)
- 1/8 teaspoon salt per each four-ounce jar

Wipe the rims with a clean, damp cloth, then place the lids and rings on, tightening them “fingertip tight” – which is similar to how tightly you’d close a jar of peanut butter. (Not too tight, but not too loose!)

Time to Can!
Place the filled jars down into the canner, then secure the canner’s top. Process according to the following recommended times:
35 minutes for pints, half-pints, and four-ounce jars at 10 pounds of pressure, unless you live at an altitude above 1,000 feet, then you want to use 15 pounds of pressure.
NOTE: Nanette asked a great question in the comments below about the water being so high that it covered the small jars in her canner. This doesn’t happen with my old hand-me-down pressure canner, but if it happens in your brand of canner, I believe that you would want to move up to a half-pint jar instead so that the jar isn’t completely covered. (With the thought that we want to pressure can peppers with steam, not give them an ultra hot water bath. I will update this space if I learn differently!)

And that’s it!
Now you have made your very own home-canned diced green chiles and peppers!
After 24 hours, remove the rings (to prevent rusting and stuck lids), label, and store your beautiful creations. Shelf life is the standard 1+ year for home-canned goods.
Since these are a low acid food, you can not water bath can peppers! If you don’t own a pressure canner, or feel too intimidated by the process, you can always freeze your diced peppers in small portions instead.

More Food Preservation Ideas
We have more articles about canning, freezing, and food preservation written here, plus many more to come!
Here are a few of those; check our “Preserve” tab for more!
- How to Can Fresh Pinto Beans
- Double Red Corn Cob Jelly
- How to Can Fresh Kidney Beans
- How to Freeze Summer Berries
- How to Make Dandelion Jelly
- How to Can Fresh Black Beans
- How to Freeze Peppers
- Harvesting & Drying Black Walnuts

Canning Diced Green Chiles (& Other Peppers)
Equipment
- a pot for boiling water
- a pressure canner
- four-ounce canning jars with lids, rings
- a jar lifter, for handling hot jars
- chopstick or skewer, for air bubbles
- damp paper towel, for wiping rims
- scissors for chopping
- gloves, if working with hot peppers
Ingredients
- fresh peppers (4 1/2 to 5 lbs for abt 28 small jars)
- salt (1/8 tsp per four-ounce jar)
Instructions
- Wearing gloves, remove the tops, seeds, and ribs from the peppers.
- Heat a grill medium to medium high, then roast the peppers for several minutes over the flames. Or, place in a 400 degree F oven for 6 to 8 minutes, turning a few time.
- Remove from heat once the skin starts blistering, then quickly place in a bowl and cover with a heavy towel to trap steam in the bowl. Let the peppers cool until easy to handle then remove skins, if the peppers are thick walled. (Thin peppers may not be easy to skin, and that's okay to omit this step for those.)
- Dice the peppers into small pieces. (Be sure to wear gloves when handling the hot peppers!)
- Prepare the pressure canner by adding 2 to 3" water, or the recommended amount by manufacturer. Turn to medium heat to start warming up. Start the pot of water boiling; it will be used to fill your jars.
- Fill each jar with diced peppers to the 1 inch headspace mark (usually the lowest raised line at the top of the jar).
- Add salt to each jar. (1/8 tsp for four-ounce jars; 1/4 tsp for half-pint jars)
- Pour boiling water over the peppers to the one inch line. Use a skewer or chopstick to remove air bubbles, then adjust pepper and water amounts as needed to maintain the proper headspace.
- Wipe the rims with a clean, damp paper towel or cloth.
- Place the lids and rings on the jar, the place the jars in the canner.
- Tighten the pressure canner lid, then place over high heat until a steady stream of steam comes out of the vent pipe for 10 minutes, or however long the manufacturer suggests.
- Canned peppers are processed for 35 minutes, whether you use four-ounce jars, half-pint jars, or pint jars. At 0 to 1000 ft altitude, use 10 lbs of pressure, if you're above 1000 ft, then use 15 lbs of pressure.
- After processing and the canner has naturally depressurized, you can open the canner’s lid, then let the jars stay in the hot water for about 10 or 15 minutes before removing. Place the jars on a towel and leave completely undisturbed for at least 12 to 24 hours.
Can this be water bath canned?
Hi Kaitlyn! Unfortunately this recipe can’t be water bath canned; peppers are a low acid food, so they have to be pressure canned to stay safe.
You could try freezing them in can-sized portions though!
question. if my all american canner says 2 to 3 inches of water and water end up going over the 4oz jars first layer will it still can correctly?
Hi Nanette! I have a very old hand-me-down double layer canner that calls for water by quarts instead of inches and the water goes pretty high on the jars in there too, but they are not completely covered.
That’s a really good question about the water going over the jars, since you want the steam to work on them. In this case, I would use the half-pint jars instead and/or check with the canning experts at Ball to see what they advise.
https://www.ballmasonjars.com/support/contact-us
Thank you for this! I’m doing a canner load of poblanos right now. So grateful to not have to use up valuable freezer space.
Awesome! I feel the same way; it’s very nice to have canned peppers so convenient on my pantry shelves. Freezer space is pretty limited here even with several chest freezers & I always worry about extended power outages, so like to can whenever possible! 🙂
Thank you been looking for just a simple recipe.