Canning Fresh Kidney Beans
Learn how to can fresh kidney beans when they’re in the shelling stage! Homegrown canned beans have an amazing taste and texture.

It’s easy to grow your own kidney beans in a home garden. They’re not fussy, and provide loads of beans for the small price of seed. (Yes, you can even plant inexpensive store-bought bags of dried kidney beans – we’ve had good success with that method!)
Home canning using a pressure canner ensures that the kidney beans are completely cooked and shelf stable, making them a perfect addition to your food pantry.
This article details how to can fresh kidney beans.

We also have more canning recipes for beans!
This same method works for other similar types of beans grown in your garden such as navy, great Northern, etc. You can even mix and match different types of beans in the same jar, since they all share the same processing time.
NOTE: If you’re canning Green Beans (string beans, wax beans), the process is different. We’ll write a future article about them.


Harvesting & Preparing Fresh Kidney Beans
Kidney beans mature at different times, so when you check your plants, you’re likely to see some beans in the green stage, some that are yellow, and some that are brown/mottled and dried up.
What we want for canning is the shell out stage (also called shelling stage, or shelly beans).
The bean shell will be yellow and feel kind of pliable and bendy. When you open up the shells, the kidney beans will be light pink to dark pink colored.
If you open up a shell and see green kidney beans inside, they aren’t quite ready yet!

Sorting Your Beans
When I’m collecting beans from my garden, I bring along two containers or buckets.
I leave any green-shelled kidney beans on the vine. The ones with yellow or yellow-green shells go into one of the collection containers, while the dry beans go into the other container.
You can pressure can fresh kidney beans while they’re soft and in the shelling bean stage without soaking them. However, once they’re dried, they’re treated separately, since they’ll need soaking and more treatment to rehydrate them. So keep those dried ones separate to use at a later time.

Storing the Fresh Beans
Once inside, you can refrigerate the pods for around 2 or 3 days, if you don’t have time to shell them yet. Keeping them tied up in a plastic grocery bag will help them stay fresh.
After they’ve been shelled, you can store those shelled beans for another day or two in a sealed storage container in your fridge, but don’t wash them until right before you’re ready to pressure can them.
Shelling Beans & Time Considerations
When you’re shelling beans, keep an eye out for any with brown spots, or that are shriveled or moldy. Those should be tossed – you don’t want bad beans in your yummy homemade canned goods!
Do be aware that shelling kidney beans is a SLOW process. It’s similar to the time it takes to shell fresh garden peas. We line up a few shows or movies we want to watch on TV and just marathon through the process.

How Many Beans do You Need?
For kidney beans, I find that around 6 1/2 pounds of kidney beans in the shell will yield about 4 or 5 pints of canned beans.
Another way to calculate is that about 1 1/3 cups of fresh, shelled kidney beans will roughly make one pint of canned beans.
These are ballpark numbers, because each harvest is different. First pickings usually have a large amount of beans in great shape and the yield is higher. By the time you’re picking the last beans though, many have succumbed to bugs, weather, and mold, so you end up with less usable shelled beans. It also depends on how picky you are about bean quality when shelling.

Canning Kidney Beans Recipe – with FRESH beans
Standard, modern safe canning practice is that you must use a pressure canner to can fresh beans – or any kind of beans for that matter. Because they’re a low acid food and are very dense, beans require a long pressure canning time to ensure a safe product.
Kidney beans also must be thoroughly cooked in order to be safe to eat. The high temperatures and long time of pressure canning will fully cook the beans.
* Do not use an Instant Pot, pressure COOKER (you want a CANNER), or water bath canner for canning beans.
**Before You Begin**
If you’re new to pressure canning, or just need to refresh your memory, stop right here and go read the National Center for Home Food Preservation’s guide to Using Pressure Canners.
Also read through your entire pressure canner’s manual to make sure you’re completely knowledgeable and aware of how pressure canning works.

You’ll need these ingredients & supplies:
- shelled kidney beans at the shelling stage
- salt (1/2 tsp pints, 1 tsp quarts)
- a pot for boiling the beans
- a second pot of boiling water, to fill the jars
- a heatproof mesh strainer
- a pressure canner (not a pressure cooker)
- pint or quart jars with lids, rings
- a jar lifter, for handling hot jars
- a wide mouthed canning funnel, for filling jars
- a chopstick or skewer, for air bubbles
- a soft cloth or paper towel, to wipe rims
- a towel, to place jars on
Directions to can kidney beans:
Before you’re ready to can, prepare the pressure canner by filling it with 2 to 3 inches of water. (This is 3 quarts of water for our pressure canner – look at your device’s booklet for specific instructions.)
We have hard well water at our house, so we also add 2 tablespoons of white vinegar to the canner to keep the inside from discoloring, or building up hardwater deposits.
Wash or rinse your jars and fill them about 1/3 to 1/2 way with extra water, then place them down in the pressure canner. This is the method we use to keep the jars perfectly hot for filling.

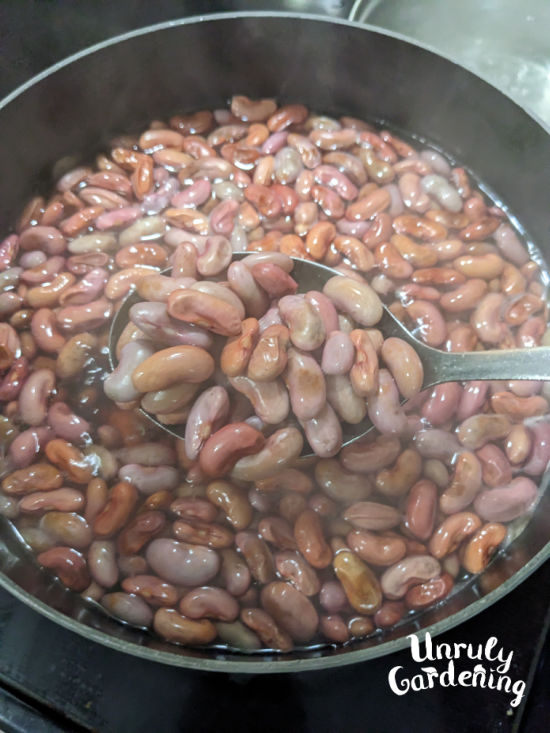
Rinse the shelled kidney beans with cold running water.
Boil a pot of water, then add the beans to the pot. Return to a full boil, then boil for 3 minutes. At this point – if you’d like, and are extra concerned about phytic acid or lectins, you can remove from heat, cover the pot, and soak the beans for 30 minutes to one hour.
However, the long pressure canning process destroys most, if not all lectins/phytic acid, so many people also can their fresh beans the “old timer way”, which is the way I learned. With that method, you don’t soak the beans after boiling.
I’ve done both soaking/not soaking methods, and the beans are tender and digestible either way.
Place the canner on a burner and turn to medium, so the water in the canner and the jars will start heating up.
Drain the beans, and discard the cooking/soaking water. Rinse the beans lightly with fresh water.
Remove the hot jars from the pressure canner and tip the extra water from each jar out into the sink as you do so. That water was only needed to keep the jars hot, and shouldn’t be dumped into the pressure canner.
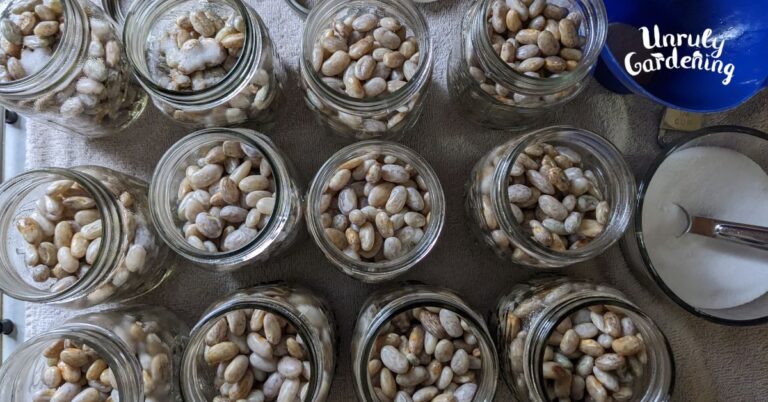
Put the salt in the bottom of each jar, so you won’t forget. The recommended amount is 1/2 teaspoon of salt per pint, or 1 teaspoon of salt per quart.
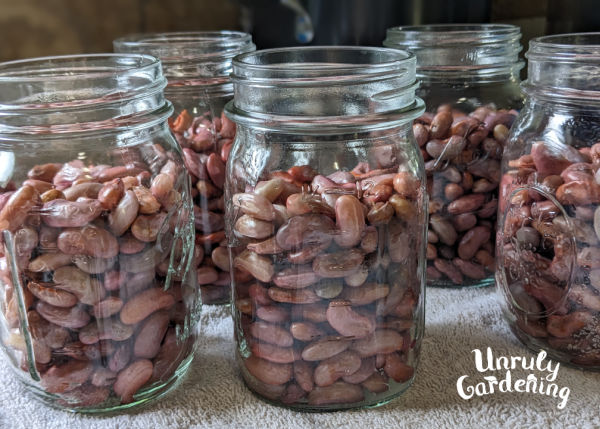
Add the beans to the jar – be sure to leave a lot of headspace (only fill up to the shoulder area of the jar) since beans expand quite a bit!
Use a slotted spoon or measuring cup to scoop the hot beans into the prepared jars. Don’t pack the beans in or fill the jar too high, they will expand more than you think they will!
Add fresh boiling water in the jar, until you reach a 1 inch headspace. (About 1 inch from the top of the jar, or around the bottom-most raised line or thread on the jar’s mouth.)

Slowly, use a chopstick or skewer to slide up and down along the edges of the jar about four or five times, to release any trapped air bubbles. This helps ensure a better chance of sealing.
Wipe jar rims clean with a damp paper towel or clean cloth, then place the lids and rings on the jar. Tighten the rings to a comfortable tightness – similar to how you would put the top back on a jar of peanut butter. Not too loose, but not so tight that your kid couldn’t open it!
Set the jars down in your pressure canner, tighten the lid into place, leaving the vent OPEN, and place the canner over high heat until the water boils and a steady stream of steam comes out of the vent pipe.

You must let the steam escape for 10 minutes first – this makes sure that no air is trapped inside the canner, and ensures the high temperatures needed for low acid and dense foods, like beans.
After 10 minutes of releasing steam, then you can place the weight on your canner and allow it to pressurize (or follow recommended manufacturer instructions for your device).
Process according the times and pressure below. Once finished, be sure to let the pressure canner naturally depressurize. Do not force cool the canner with cold running water! Not only is this unsafe, but can cause water to siphon from the jars, or failure of the jars to seal.
Once you open the canner’s lid, let the jars stay in the hot water for about 10 or 15 minutes before removing. Place the jars on a towel and leave completely undisturbed for at least 12 to 24 hours.

Processing Times for Canning Fresh Kidney Beans
For a weighted gauge canner, process pints for 75 minutes, or quarts for 90 minutes, at 10 lbs of pressure. (If you’re above 1,000′ sea level, process at 15 lbs of pressure for the same amount of time.)
If you have a dial-gauge pressure canner, process pints for 75 minutes, or quarts for 90 minutes, at 11 lbs of pressure. (For higher elevation folks: if you’re 2,001 – 4,000 ft above sea level use 12 lbs pressure, 4,001 to 6,000′ use 13 lbs pressure, and 6,001 to 8,000′ use 14 lbs pressure.)

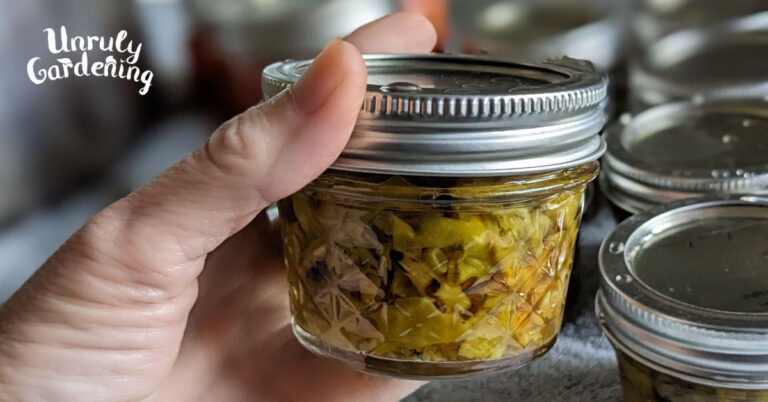
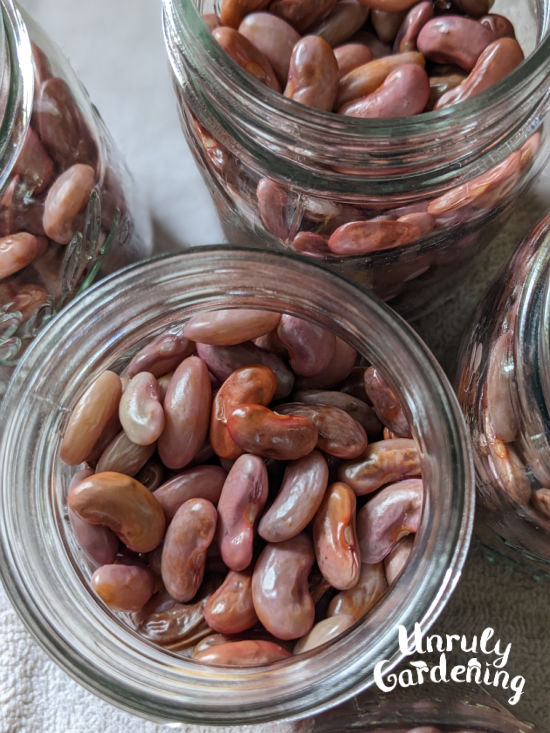
How Your Finished Canned Kidney Beans Will Look
Your freshly canned kidney beans should have a reddish color to them.
After the jar sits for a day or two, you’ll also notice that the liquid has thickened up quite a bit.
And it’s possible that the liquid amount is now lower than the beans.
That’s okay! It’s normal for beans to absorb a ton of water, if the liquid level is lower than the beans, just add less beans to the jar next time you can them.
As long as your jar has a good seal, then it is ready to store and use. It’s recommended to remove rings before storing your jars and wipe them off if needed.
This will keep your jars cleaner (canning stuff and moisture can get trapped under the rings), and eliminates the risk of the lid rusting the jar shut over time.
Video: Canning Fresh Kidney Beans Slideshow
Here’s a slideshow summarizing this article. (Sometimes an ad plays first, but the video will start right after! The video player won’t show up if you have an adblocker.)
How to Use Home Canned Kidney Beans
These can be used in your favorite recipes just like store-bought beans.
If a recipe calls for a can of beans, just use a pint jar of home-canned beans instead.
The long pressure canning process completely cooks these kidney beans, so they’re ready to go right out of the jar, just like a purchased can of beans from the store.
Printable Recipe Card

How to Can FRESH Kidney Beans
Equipment
- a pot, for boiling the beans
- a second pot, for boiling water
- a heatproof strainer
- a pressure CANNER (not a cooker)
- pint or quart jars, with lids & rings
- a jar lifter, for handling hot jars
- a canning funnel, for filling the jar
- a chopstick or skewer, for air bubbles
- damp paper towel, for cleaning jar rims
- a towel to place the cooling jars on
Ingredients
- shelled, fresh kidney beans
- salt (1/2 tsp for pints, 1 tsp for quarts)
Instructions
- When you're ready to can, prepare your pressure canner. Add the recommended amount of water according to the manufacturer (usually 2 to 3 inches of water). Place the canner on a medium heat burner, to start heating up.
- Fill your clean jars about 1/3 to 1/2 of the way with water & place in the pressure canner (to help them heat up and stay hot), or keep the jars hot in a dishwasher.
- Rinse the shelled beans with cool water, then dump them into a pot of boiling water.
- Boil a pot of water, then add the beans to the pot. Return to a full boil, then boil for 3 minutes. At this point, IF you'd like to, you can remove from heat, cover, and soak for 30 minutes to one hour. The way I initially learned to can fresh beans the "old timer way", we didn't soak after boiling, but if you're concerned that pressure canning won't destroy all of the phytic acid/lectins, then this is the place to soak your beans. (I've done both ways and either method results in very tender, digestible beans.)
- Place the canner on a burner and turn to medium, so it and the jars can start heating up. It doesn’t need to come to a boil, but should be nice and hot.
- Drain the beans, and discard the cooking/soaking water. Rinse the beans lightly with fresh water.
- Remove the hot jars from the canner, (pouring the extra water in each jar down into the sink), or from your dishwasher. Fill each jar up to the shoulder area with beans. (Don't overfill!)
- Put salt in each jar. (rate is 1/2 teaspoon for pint jars; or 1 teaspoon for quart jars)
- Pour boiling water into the jars, to a 1 inch headspace. (This is just below the bottom line at the top of the canning jar.)
- Use a chopstick or skewer to remove air bubbles. If you need to, add a little more water at this time to maintain the 1 inch headspace.
- Wipe the rims of the jar clean with a soft cloth or damp paper towel, then apply the lid and ring.
- Set the filled jars down into your pressure canner, tighten the lid, place over high heat until a steady stream of steam comes out of the vent pipe for 10 minutes, or however long the manufacturer suggests.
- Check the notes below for specific processing times and pressures.