How to Freeze Summer Berries
Learn how to freeze fresh berries, their expected shelf life, and what to expect when using them from the freezer. We’ll cover: alpine strawberries, blackberries, boysenberries, blueberries, elderberries, raspberries, and strawberries!

7 Berries to Freeze
Berry season has arrived, and so the harvests begin! There are few things better than a bright bowl of your own homegrown fruit, harvested perfectly ripe at the peak of their season, or a beautiful haul from the local farmer’s market.
There’s a problem, though – your refrigerator has limited space, and your harvest is taking up too much room in there! To the freezer the berries must go!
While we don’t have every single berry on earth on our property, we do have no small amount of fruit-bearing plants growing here. The following information comes from our personal experiences: hopefully it can help you out!
Alpine Strawberries (red, white, & yellow)
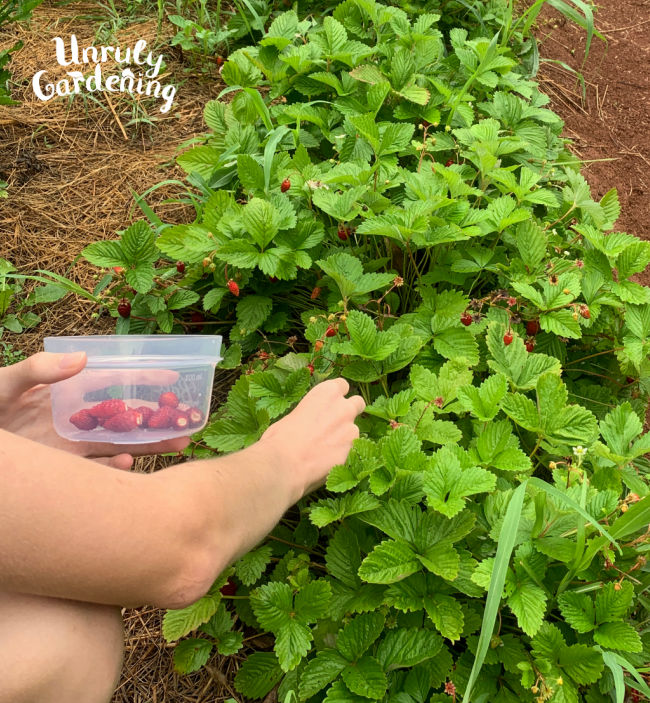
About: Exceptionally small, fragile fruits begin breaking down exceptionally quickly. Berries will suffer in flavor and texture if left at room temperature: freeze as soon after picking as possible.
Picking for Freezing: Pick only fully ripe fruit that is plump, undamaged by insects, and is not covered in dirt.
Preparing for Freezing: It is best to avoid washing the fruits, as they absorb water quickly and will often tear and start to break under a strong stream of water. If you must, use a very gentle trickle of water, and try not to leave the fruits in water for long. Gently shake dry in your hand, but don’t use any force or pressure, or else the fruits will pre-emptively turn into jam!
Freezing: As soon as possible, place fruits in a freezer-safe bag labeled with contents and date. Carefully place in freezer, making sure the fruits do not get crushed by heavier items in the freezer. Let freeze until solid.
Alternatively, lay out berries in a single layer on a wax-paper or parchment paper lined trays. The alpine strawberries should then be left until frozen solid, and then transferred over to freezer-safe, airtight containers or bags for storage. If using bags, remove as much air as possible before sealing bag for best storage life. Be careful not to squish the berries!
Shelf-life: Alpines can theoretically last for up to a year once frozen. I’ve found that they start getting a bit of freezer taste around the 6 month mark, however. Taste regularly, and toss if you notice large chunks of ice beginning to form in the berries, or if they begin to taste freezer-burnt.

What to expect: Alpine strawberries tend to shed their seeds when frozen. If you like the taste of alpine strawberries, but dislike their seediness, then this might be good news for you! The seeds will shed as the berries bump against each other, or often at a touch. Don’t be surprised if you see a layer of seeds building at the bottom of the bag. You can dump them out if they bother you.
How to use: Don’t de-thaw alpine strawberries before using. Avoid leaving out at room temperature – ideally, pull out the alpines when you need them, add them to whatever you’re making, then place them back in the freezer as soon as possible.
Add alpine strawberries fully frozen to smoothies in place of regular strawberries for a bright, wild strawberry flavor. Alternatively, drop into pancakes, or use them to make a stovetop spread. Alpine strawberries are also delightful simply eaten, still frozen, as a snack.
Related article: Alexandria Alpine Strawberries – Plant Spotlight
Blackberries
About: Hardier than alpine strawberries, fresh blackberries still shouldn’t be left out at room temperature once picked for longer than a few hours at a time for best flavor, texture, and shelf life.
These can be stored in your refrigerator for up to two days before you start putting them up, however. Rotten, insect-eaten, or crushed berries in a batch can cause quicker spoiling, so make sure to glance over your harvest before you put it away.
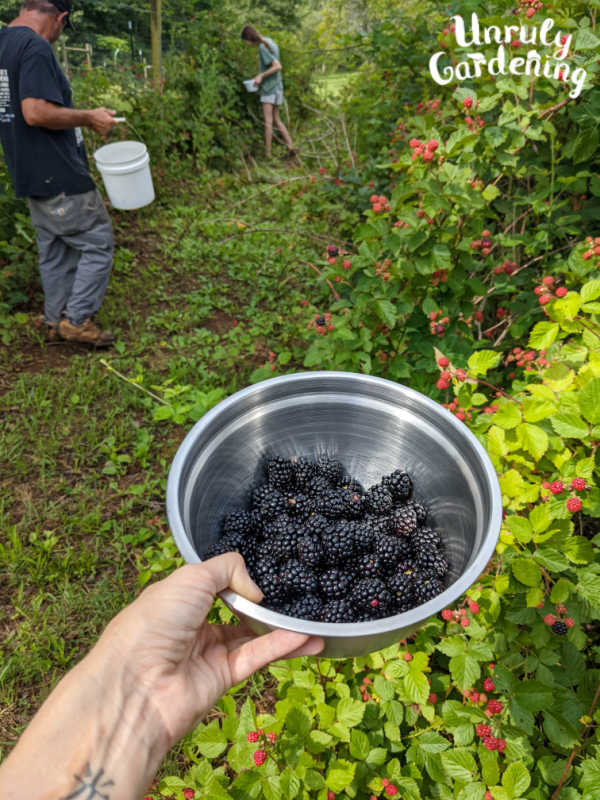
Picking for Freezing: Pick fully ripe berries that easily separate from the plant. Choose plump, glossy, fully black fruits with no traces of red. Don’t collect any fully or partially red fruits that you have to yank off the cane – those are under ripe, and will be sour. Ripe berries will come off the plant with minimal resistance. Avoid rotten, overripe, dirty, and insect-bitten fruits as well.
Blackberries have a good bit of weight to them, and deep buckets of blackberries often end up crushing the lowest layer under their own weight. To avoid crushed berries, use several shallower containers to place your harvested fruits in, rather than, say, all the berries together in a 5 gallon bucket.
Preparing for Freezing: If you notice ants among your blackberries – sometimes they’ll hide in there – you may want to spread your blackberries out somewhere for an hour or so in a single layer so any tagalongs can get a chance to leave.
You don’t need to wash your blackberries- we never do- but if you want to wash your blackberries, do so very gently, so as not to damage the fruits.
Place them in a colander, a handful at a time, and rinse with cool water. Lay flat on top of an old towel. You can gently pat the fruits with another old towel (you do want old towels for this- if there’s any juice leaking from any of the berries, it will stain) to blot some of the water off.
Let the fruits dry before freezing them- excess water could risk freezing them to the pan.
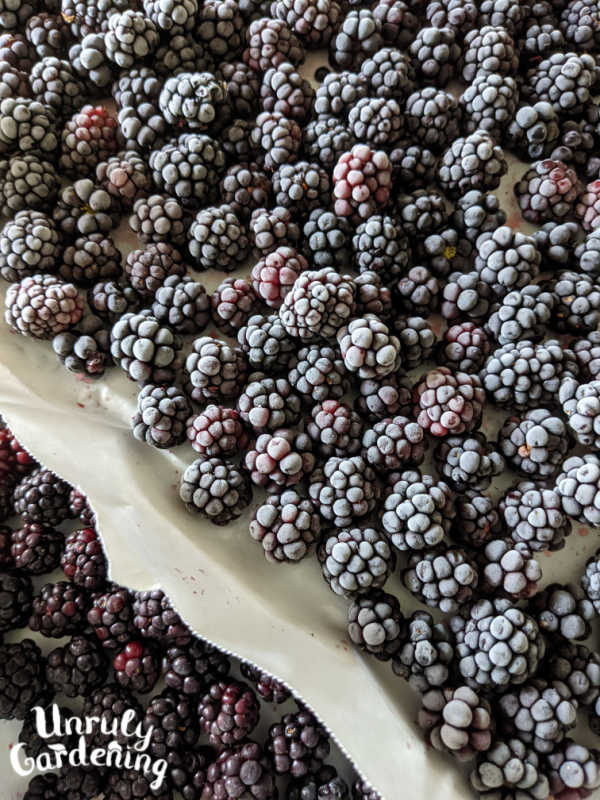
Freezing: Line a baking sheet or cookie sheet with wax, parchment, or freezer paper, and pour the whole blackberry fruits onto the pan. Spread out into a single layer of berries. If you have a lot of blackberries, use multiple pans.
Do a quick check over each pan before you move on to freezing them, removing any spoiled, dirty, crushed, or otherwise undesirable berries you might have missed. Once you’re sure everything’s good, place the pan in the freezer, and leave it there until berries are fully frozen.
After berries are fully frozen, remove from the freezer, and, working quickly so that the berries don’t dethaw, transfer the blackberries into freezer-safe, air-tight containers, baggies, or vacuum-seal bags, labeled clearly with the contents and date.
Seal securely, remove as much air as possible if sealing in bags, and store back in the freezer.
Shelf-life: Expect the blackberries to stay good in the freezer for 6 months to a year. Vacuum-sealed bags of blackberries have a significantly longer lifespan in the freezer than other storage methods, and could possibly good for years, plural. Toss berries once they start tasting like freezer. It’s a good idea to try and use up your blackberries over the space of a year, so that when blackberry season starts again, you can restock yourself with a fresh batch.
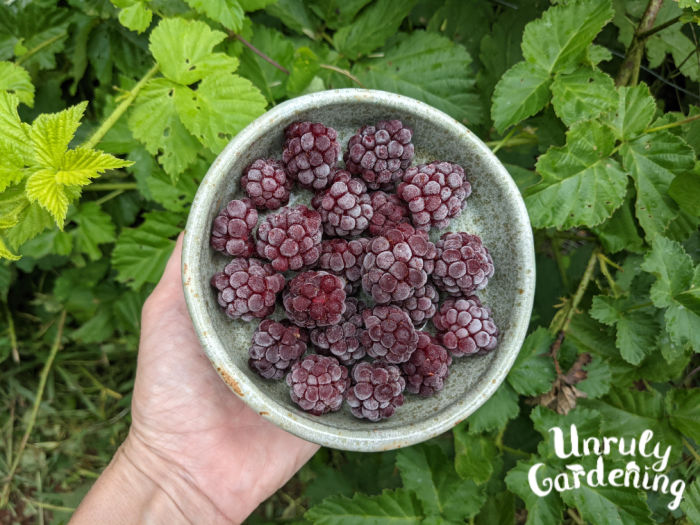
What to expect: When frozen, you may notice some of the berries start turning red instead of staying black. This is normal, and nothing to be alarmed over. Your blackberries are still perfectly good, so don’t go tossing them out!
How to use: Blackberries are usually used right from frozen, without thawing them out first. For recipes such as blackberry cobbler, muffins, and the like, simply drop the fully frozen fruit in, and mix.
For recipes such as jelly, jam, syrups, and other recipes where you’d cook the berries over heat to get their juice or try to turn them liquid, you can either drop them in the pot fully frozen, or let them thaw a bit before putting them over the heat in order to get a head start on that juice extraction. Just don’t let them sit out at room temperature for long to prevent spoilage, and never try to re-freeze berries that have thawed out.
Another way to thaw the berries is to place them in your refrigerator for a while, so they’ll slowly thaw out. (Again, don’t re-freeze any berries that have been thawed from frozen- just toss or compost any leftovers.) Frozen blackberries sprinkled with a bit of sugar and placed in the refrigerator to partially thaw for a couple of hours can be a treat – we like this for a dessert in the dead of winter!
Boysenberries
About: Boysenberries are blackberries’ larger, more fragile relative. Undamaged, whole fruit can be stored in the refrigerator for several hours to perhaps around 1 day, but should be frozen after that, before they can begin to spoil. Avoid leaving at room temperature for an extended period of time.
Picking for Freezing: Pick fully ripe, undamaged fruits. Ripe fruits are plump, dark purple in shade, and are more matte, as opposed to blackberries (which are glossy black when ripe). It is sometimes difficult to tell when boysenberries are ripe: it is a good idea to repeatedly harvest and taste at different stages, until you get a feel to exactly what a ripe boysenberry feels like in the picking.
Avoid picking into deep containers heaped with boysenberries: boysenberries are both heavy and fragile, and can easily end up crushing the lower layer of berries under the top layer’s weight.
Preparing for Freezing: Avoid washing the fresh berries if at all possible, as they can be easily damaged by doing so. Berries will stain cloth vividly, so if you do wash them, only gently pat dry with old towels or paper towels, and maybe avoid wearing clothing you care strongly about keeping unstained while handling.
Pick out any spoiled or underripe berries, or those crushed too much to be useable. Some small amounts of damage with boysenberries is common- their skins break easily, leaking bright magenta juice everywhere. These are still fine to freeze.
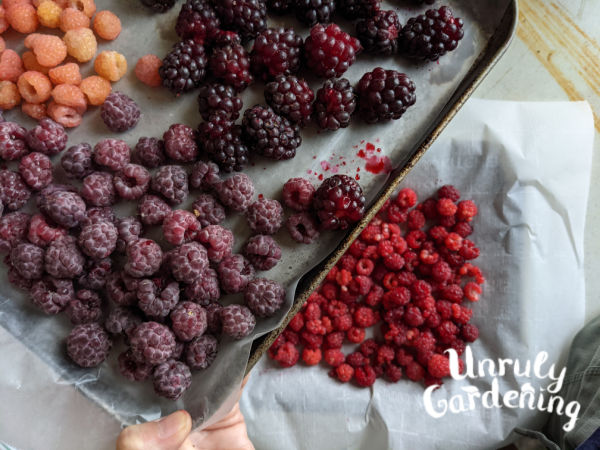
Freezing: Spread out boysenberries on a single layer on a wax, parchment, or freezer paper lined baking sheet or cookie sheet. Place in freezer, and freeze until solid. Package away in your choice of freezer-safe, airtight container or bag, and label with date and contents. Return to freezer.
Shelf-life: Shelf life will depend on storage measures. Expect anywhere from 6 months to a year or longer. Vacuum-sealed bags, like as for blackberries, will give the longest expected shelf life, while a freezer bag may be expected to be closer to the 6 month mark, depending on how much air is left in the bag. If they start tasting like freezer burn, toss them.
What to expect: Some berries may gain a red flush once frozen.
How to use: Use the fully frozen fruit in recipes. Boysenberries can be dropped into muffins and cobbler straight from the freezer, and frozen fruits can be placed directly in a pot over heat to make jams, jellies, and syrups. They are also good to snack on as a frozen treat – eaten by the handful right out of the freezer, or thawed for a few hours in the fridge first!
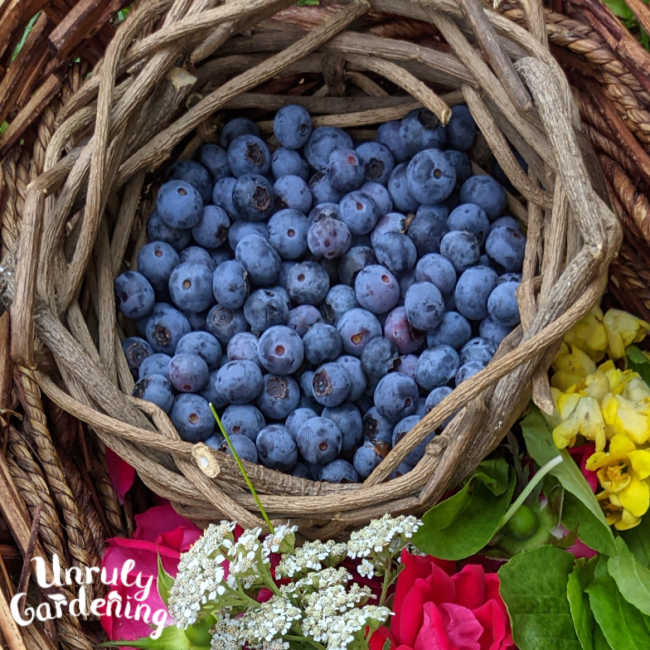
Blueberries
About: For a small little berry, blueberries are pretty tough! They don’t crush or get damaged quite as easily as other berries (like, for example, boysenberries), and can be kept in the refrigerator for about 3-4 days before needing to be frozen.
Picking for Freezing: Pick fully ripe, undamaged blueberries for freezing. Discard any spoiled or damaged berries.
Preparing for Freezing: If the blueberries are clean, then you will not need to wash them, and can simply freeze them as-is. If you’d like to wash them, however, pour blueberries into a colander, and rinse with cool water.
Check over to ensure there are no damaged or spoiled blueberries in your harvest, and discard any that may have snuck in. If you notice any underripe blueberries, you may wish to pick them out, too, as they will not become sweeter once frozen, rather remaining tart.
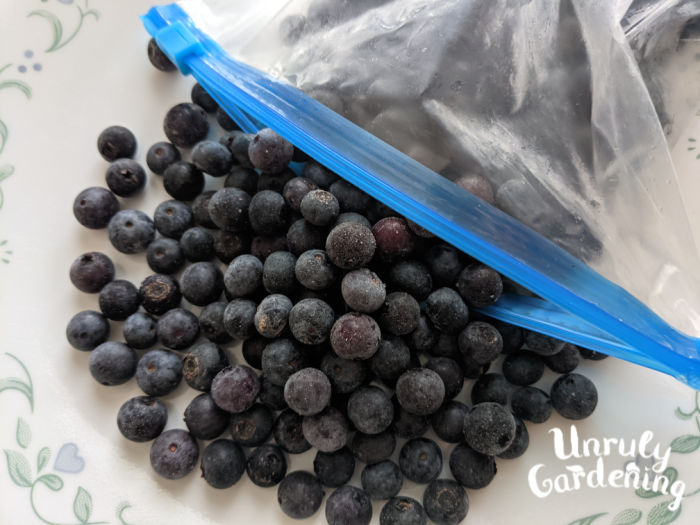
Freezing: Blueberries are less prone to damage than many other types of berry. While you can spread them out in a single layer on a baking sheet or cookie sheet covered with wax, parchment, or freezer paper if desired, you can also just simply place the blueberries in freezer bags and seal them, setting them in the freezer. Freeze blueberries until solid.
If you want to vacuum-seal your blueberries, consider freezing them first with the baking sheet/pan method, as this will give them extra solidity, making it less likely for them to get crushed by the vacuum sealing.
Shelf-life: 6 months to 1+ year. Shelf life depends largely on sealing method: a simple freezer bag may only give 6 months (but could potentially last up to a year), while vacuum sealed bags likely will give a shelf life of over a year.
If your frozen blueberries start to taste like freezer burn or begin to get a strange, unpleasant texture, they’ve reached the end of their shelf life, and they should be tossed.
What to expect: No surprises or problems to come from blueberries, really. They’re very well behaved little fruits.
How to use: Blueberries can be used fully frozen in baking and for making jellies, jams, and syrups. They can also be thawed, but thawed berries should never be re-frozen once they’ve been thawed out for safety.

Elderberries (blue & black)
About: Elderberries are not a snacking berry, but rather a medicinal one. Those who like to make their own elderberry syrup might want to freeze some elderberries so they can make a fresh batch in the middle of winter, or the start of spring. The berries can handle 1-2 days in the refrigerator before freezing, but will be at their best quality if frozen the day they were picked.
Picking for Freezing: Pick ONLY fully ripened berry clusters that are completely dark in color. Red berries and underripe berries are inedible and can cause illness. Use pruning shears or scissors to snip off whole clusters of the fully ripe berries, collecting in a bag or basket.
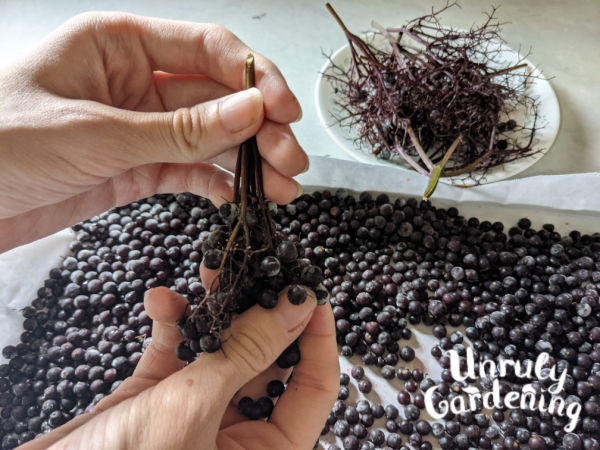
Preparing for Freezing: Berries are easiest to remove from the stem after freezing- this means there’s just about no preparation required, rather than checking over your clusters for any tagalong bugs and gently shaking or tapping them off.
Freezing: To freeze, place the whole cluster berry-side down on a baking or cookie sheet lined with wax, parchment, or freezer paper. Place in the freezer. Once berries are frozen solid, Remove, and use your fingers to rub the berries off the stems. They should come off easily, for the most part, leaving their stems behind. If you see a stem still attached to a berry, or a chunk falls off into the berries, remove it.
Scoop up the destemmed berries and pour them into plastic freezer bags. Squeeze out as much air as possible, and use your fingers to make the berries fill out the bag more in a flat layer. Place back in the freezer.
Shelf-life: Frozen elderberries should be good for about 1 year if kept frozen.
What to expect: Berries can get a little silvery coating when pulled from the freezer to destem- this is normal and fine. Berries can also stain cloth pink- don’t wear a white or pastel shirt while handling unless you’re fine with the possibility of stains!
How to use: Elderberries should not be eaten raw (and never eat the seeds); they’re most often cooked to turn into juice for making syrup. It is fine to use them from frozen, but they can also be thawed first, in which case they’ll end up releasing some juice as they do so.
Related article: Elderberries: How to Harvest, Preserve & Use
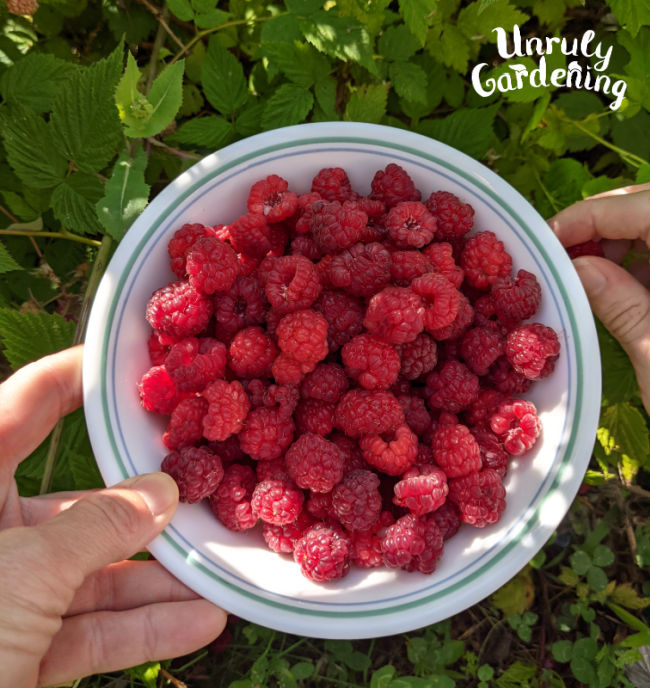
Raspberries (red, gold, black, & purple)
About: Raspberries are very much on the more fragile side, and should be picked into shallow containers or trays if you want to avoid crushing them. Very soft, hollow-centered berries crush, collapse, and tear very easily.
Picking for Freezing: Pick fully ripe, undamaged raspberries, leaving behind squishy, rotten, overripe, or bug-damaged fruits. Raspberries easily come off the plant when ripe, leaving behind their cores. If you have to yank hard to remove a raspberry from the plant, it’s not ready yet. Any raspberries that still cling to their cores are underripe.
Preparing for Freezing: Avoid washing: raspberries don’t tend to hold up to washing well, getting damaged, falling apart, and holding water inside their hollow center, which is undesirable for freezing.
Double-check as you go through the next step for any spoiled, rotten, or bug-damaged berries, making sure to pick them out and discard them if you spot one.
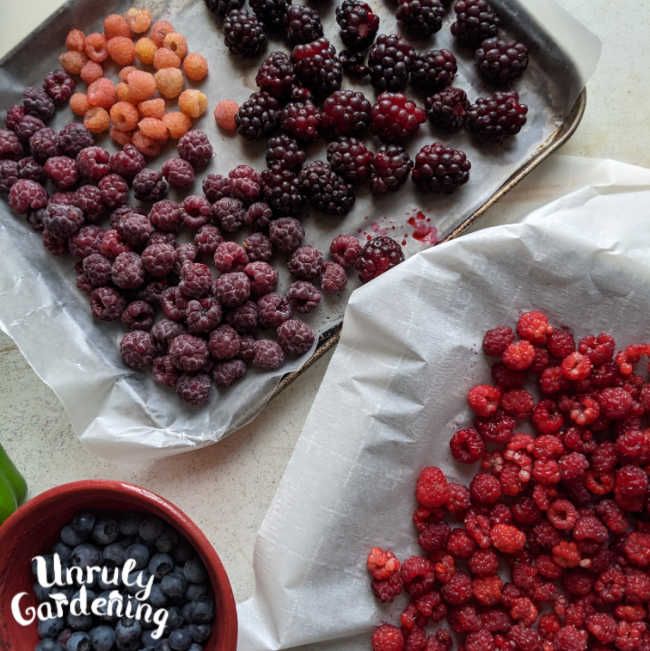
Freezing: Spread the raspberries out in a single layer on a wax, parchment, or freezer paper lined baking or cookie sheet . Some raspberries might end up being less-than-perfect in shape or be falling apart a bit: this is normal. In our garden, we’ve noticed that our purple and gold raspberries seem to hold their shape better than the heirloom red raspberry we grow. This may be due to variety, not strictly because of color, but it’s interesting, either way!
Place in freezer until berries are completely frozen. Then remove from freezer and quickly portion and pack away into your choice of freezer-safe container or bag. Label with date and contents, and place back in freezer.
Shelf-life: 6 months to 1+ year, depending on sealing method. Vacuum-sealing, as usual, gives the longest shelf life. Once you notice your raspberries tasting of freezer or notice large amounts of ice crystals forming in the bag with them, they should be discarded.
What to expect: Raspberries can fall apart once frozen if they get banged around a bit. The pressure of vacuum-sealing can compress and crumble the raspberries further, so it’s not the best method if you’re trying to keep your raspberries in as few pieces as possible. Plastic freezer bags are likely your best choice for storage, in that case.
How to use: Use the fully frozen fruit in baking and jelly, jam, or syrup making. Frozen raspberries can simply be dropped into batter for things like muffins, or placed in a pot in the case of jelly or jam to heat up, dethaw, and break down.
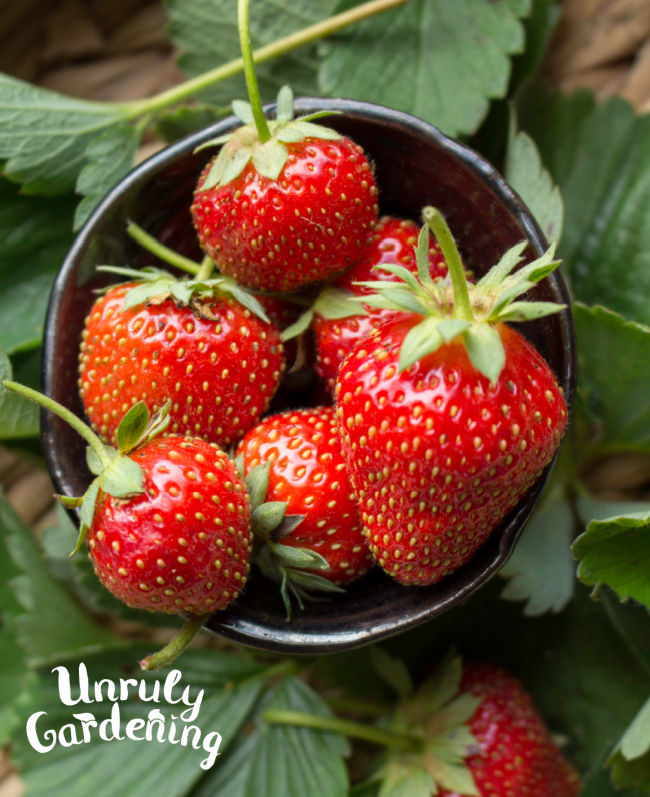
Strawberries
About: Not as tough as a blueberry, but tougher than an alpine strawberry, homegrown strawberries still only tend to last a day or two in the refrigerator before needing to be frozen.
Picking for Freezing: Pick clean, ripe fruit without insect damage. Ripe strawberries are red, soft, sweet, and aromatic – if you’re not sure if the strawberries you’re picking are ripe, taste a few to decide!
Preparing for Freezing: Wash the strawberries if needed (or if they’re clean, you can skip this step). The easiest way to do this is to place them in a colander and swish cold water through them, shaking the colander afterwards to knock some water off.
There are 3 common ways of freezing strawberries: Whole, halves, and slices.
Take a sharp knife, and cut off the top of the strawberry, removing the green leaves. Repeat until all strawberries have had their tops removed. Leave whole, cut into halves, or cut into slices – the choice is yours!
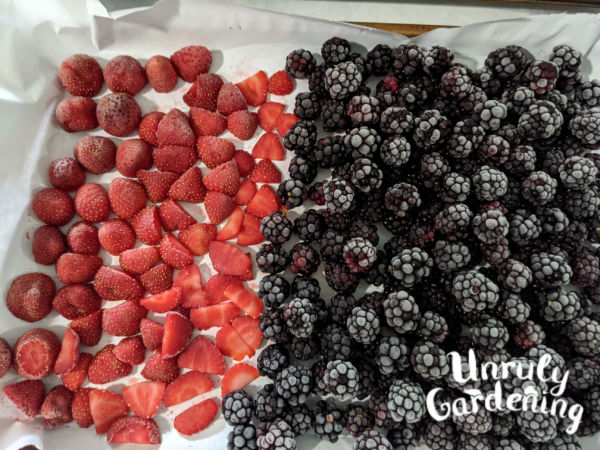
Freezing: Place the strawberries onto a parchment or freezer paper lined baking sheet, freeze them solid, and then portion and seal the strawberries up into your preferred freezer-safe, air-tight containers or bags. Make sure to write the date and the contents of the container on it before putting it in the freezer!
Shelf-life: 6 months to 1+ year. Strawberries hold up fairly well when frozen.
What to expect: No real surprises from freezing strawberries: they don’t turn color or tend to fall apart after freezing, though they may drop some seeds.
How to use: Both frozen and thawed strawberries have their uses. Thawed frozen strawberries are delicious sprinkled with a bit of sugar, and frozen strawberries are good in baked goods, jellies, and jams.

F.A.Q.
Why should you freeze your berries?
Frozen berries last significantly longer than they do when fresh. The simple act of freezing extends the lifespan of your fruit harvest from scant days or weeks to months- letting you enjoy the fruits of your labor all the way through fall, winter, and the spring beyond!
This is especially significant in berries such as alpine strawberries and boysenberries, which are so fragile they break down too quickly to bother storing in the refrigerator.
Is freezing the only way to preserve my harvest?
No! Freezing is certainly an easy way to preserve your harvest, and it leaves them in a very usable form for future projects, but there are other ways to preserve and use your harvest that doesn’t involve filling up your freezer with bags upon bags of fruit.
Jams and jellies are the obvious first alternative, but there are many people who don’t like (or in some cases, can’t have) them. Some berries can be canned whole. Others can be turned into syrups (blueberry syrup in particular is delicious), or sauces, and canned that way.
If canning also isn’t on the table, some berries can also be dried, or turned into fruit leather and dried that way.
If you’re interested in making jams and jellies – check out our evergrowing collection of recipes!
Our articles are for information and idea-sharing only. While we aim for 100% accuracy, it is solely up to the reader to provide proper identification. Be sure to seek out local foraging classes and plant walks, and invest in mushroom and foraging guides suitable for the area you live in, since some wild foods are poisonous, or may have adverse effect.
[print-me target=”body”/]