How to Grow Cabbage – From Seed to Harvest
Cabbage is a classic cold-weather garden crop and one of the very first plants to put in the ground in spring. Skip shopping at the garden center for plants this year – try growing your own from seed instead!
It’s easy, you get more variety selection, and one pack of seeds will grow a LOT of cabbage!


Growing Cabbage, At a Glance
- Seed Size: Small
- Sowing method: Seeds should be sown 1/4″ deep.
- When to start: Start indoors 4-6 weeks before the date you want to plant seedlings outside.
- Estimated days to germination: 3-14 days.
- When to transplant to garden: Cool season crop. Transplant out in early spring, 2-3 weeks before your estimated final frost date.
- Spacing: 1-2 feet apart from one another. Space rows 3 feet apart.
- Cold-hardiness: Can tolerate light frosts- older plants are tougher than young ones. Sometimes can survive colder, but usually must be covered.
- Sun required: Full sun- 6-10 hours of light per day for best results.
- Soil requirements: Heavy feeder. Provide compost &/or fertilizer when planting in poor or low fertility soil. Aim for a soil pH of 6.5 to 7.5.
- Possible to grow in pots?: Yes. 1 plant will fit in a 5-gallon container.
- Support required?: Unlikely.
- Attractive to pollinators?: Usually harvested before they get a chance to bloom. However, if you let some bolt, the flowers are attractive to a number of pollinators!
- Common pests: Cabbage looper caterpillars, cutworms, cabbage worm caterpillars, flea beetles, and aphids are among the most common insect predators to find on brassica plants.

Sowing & Seedling Care
Cabbage seedlings are usually germinated inside or in a greenhouse environment to get a head start on the growing season.
We use black greenhouse trays with inserted segments, or soil blocks to start our seeds in. If you don’t have access to either of those things, you can start seeds in things such as plastic cups, milk cartons, or pots- anything that can hold soil, and withstand having some holes poked in the bottom for drainage. Ensure your container you chose to grow your seeds in has proper drainage holes.
Fill your chosen containers with pre-moistened soil, or fill them with dry soil, then water well until the soil is damp, but not sopping wet. Excessive amounts of moisture can rot seeds- we want nice, moist soil, not soup!
What about seed-starting medium?
Some gardeners prefer seed-starting medium, but we simply plant seeds directly in our preferred soil blend (usually Fox Farm Ocean Forest blend) to grow from the start, and we get absolutely lovely results.
Seed-starting medium is not a requirement to grow beautiful plants, but if you want to use it, you can. Keep in mind that it contains no nutrients, and so seedlings must be very quickly transplanted out or provided with fertilizer soon after sprouting.
Once your containers of choice have been filled, you’re ready to sow your seeds.

Sowing
The small, round, dark-brown seeds can sometimes roll away from you, so it’s a good idea to tip a small amount of seeds into your hand to select from, rather than somewhere flat, like a table.
Sow seeds into the pre-dampened soil, just barely covering to 1/4 an inch deep. Use your fingers to gently, but firmly, tamp down the soil, ensuring the seeds have full contact.
It is a good idea to loosely cover your seeds with a greenhouse top, a sheet of clear glass, or a loosely draped pieces of plastic wrap. Doing so will slow evaporation, reducing the frequency you’ll have to water until the seeds germinate.
Place seeds under growlights, or in your sunniest window. Check daily to ensure soil stays moist, and gently water if you notice it drying out.
Seeds will germinate anywhere from 3-14 days from sowing, depending on factors such as temperature, moisture levels, seed viability, and seed age. If your seeds have not germinated within 3 weeks of sowing, they probably aren’t going to- toss them, and try again with new seeds.
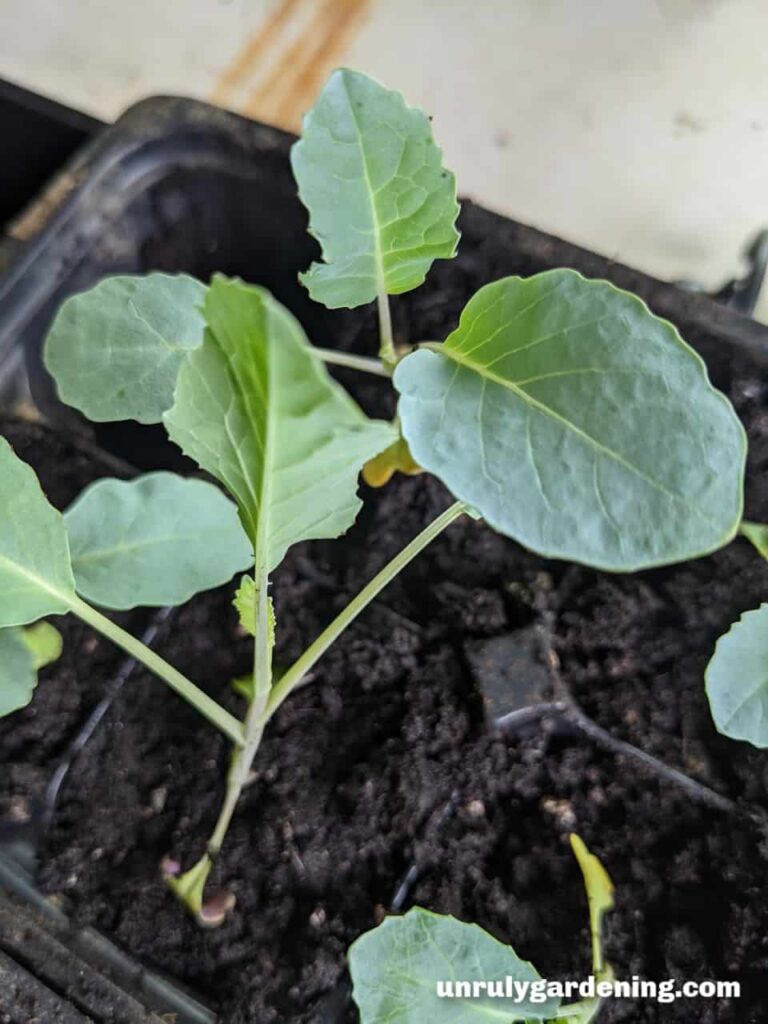
Seedling Care
Once sprouts are touching the cover you’ve put over them, remove it. If you’re using a window to provide light, rotate the tray daily to help minimize leaning.
If you’re using a grow light, continually adjust the light so it’s 2-4 inches away from your seedlings. When your light source is too far away, seedlings will stretch to reach it, resulting in longer, weaker stems. That’s definitely not something you want for your cabbage!
Keep soil evenly moist as the seedlings grow. Check the soil with your finger before watering- if it feels like a marsh, you definitely don’t need to water more. If it feels dry, you should give them a drink. Be careful not to let them completely dry out!
If your cabbage seedlings are very crowded, or they were started in small ‘plug’ type trays, you may have to transplant them up a pot size before they’re ready to go outside. If separating crowded seedlings is required, be careful and take your time teasing apart the roots. Try to avoid breaking them as much as possible. Make sure to gently, but firmly, tamp down the soil around the seedling, and give them all a good watering after transplant.
Wilting After Transplant
Seedlings tend to wilt after being potted up. While we like to give our seedlings a diluted dose of fish emulsion after potting up, you don’t have to- just make sure you don’t skip watering them well!
For the next 12-24 hours, give the wilting seedlings a break from the grow light. They should perk up overnight, at which point, you can turn the grow light back on.

Transplanting Outdoors
Once your cabbage seedlings are 4-6 weeks old, you can start getting them ready to be moved outdoors. Harden them off in a sheltered location to start getting them adjusted to life outside.
Once hardened off, plant out in the garden. Choose a location that ideally gets full sun- meaning at least 6 hours of direct light- and space the plants 1-2 feet apart. If planting your cabbage in rows, it’s recommended to space those rows 3 feet apart.
These plants are very heavy feeders, so unless you already have very fertile soil, it’s a good idea to mix a generous amount of compost, organic matter, and/or a scoop of a slow-release fertilizer in where you plan to plant them.
If you live where cutworms are a problem, those tender little stems can be protected by nestling a stick in the soil, right up against the stem.
Transplanting is a shock to all plants, so we like to give them a generous dosing of fish emulsion once they’re planted. From our personal experience, this often helps struggling plants, and seems to perk them up quicker. And since cabbage is such a hungry plant anyway, the extra nutrients hardly hurt!
Each plant should be well-soaked with water when planted out, even if you choose not to give them fish emulsion. We give at least a half-gallon of water per plant, just to make sure they don’t try out.
Don’t be surprised if your transplants look wilted shortly after they get planted! They should perk up by tomorrow, especially if you’ve given them fish emulsion.
In the Garden
Garden Care
These cold-hardy plants will be at their best in cool spring weather. Do keep an eye on your weather, though, especially while the plants are young- a hard freeze can harm them, and a frost could potentially damage the tender baby plants.
Cabbage does phenomenal when grown underneath row covers. They can be planted out earlier, and it’s an extra layer of protection from a spontaneous unforeseen extra-cold night.
Once they’ve taken to their new spot in the garden, they don’t need much tending. If you don’t get weekly rain, you should provide an inch or so of water per week.

Like most plants, make sure to pull any weeds away from their base, so they don’t have to compete for space. It’s a good idea to regularly check the plants over for any signs of pest pressure or disease. Optionally, mulching may help with water retention.
Other than that, all you really need to do is wait for the harvest- with one exception.
Pests
Cabbage looper caterpillars, cutworms, cabbage worm caterpillars, flea beetles, aphids, and cabbage root maggots are some of the more common pests to find on your cabbage.
The best way we’ve found to prevent the pests is to set up insect netting overtop the plants right from transplant. We start with a row cover, switching out to the netting once the weather warms up. In this way, we avoid harming beneficial insects with things like toxic sprays.
You can also hand-pick the various pests off. Chickens find them to be quite tasty!
As a Potted Plant
It is possible to grow cabbage in pots! However, they demand their space- one 5 gallon pot (or bucket) can hold one plant, and that’s it.
As is usual for potted plants, they will also dry out quickly, as well as have a higher demand for fertilizer. Check the soil in the pots daily, and expect to occasionally have to water up to twice in a day.
As a heavy feeder, you’ll likely run into nutrient issues: have a stock of liquid fertilizer on hand, and be ready to use it. Leaf color will tell you which nutrients you’re missing- inspect the plant, and dose accordingly.

Harvesting
Cabbage is harvested relatively early in the season when compared to things like tomatoes, or corn- it’s a spring crop, and tend to bolt in the summer heat.
The precise amount of days to harvest will depend on the specific variety you’re growing. For example, the “Golden Acre” cabbage variety is ready in around 65 days, while “Premium Late Flat Dutch” cabbage needs closer to 100 days.
Some climates can start a second batch of brassicas, some time after harvesting the first ones, as a fall planting. This requires counting back the days on your packet and some calculating. Summer heats can kill the plants, but too-cold weather too soon can prevent the plant from ever making a harvest.

When and How to Harvest Cabbage
If the heads feel firm when you give them a gentle squeeze- not hollow, with no spongy ‘give’- then they’re ready to harvest. Use a sharp knife to sever the head from the stem.
Because cabbages are rather low to the ground, sometimes the stems can be extra tough. As always when handling a sharp object, be aware of which direction the blade is pointing, pay attention to where your fingers are, and be careful!

How to Store Cabbage
Cabbage is an old, classic storage crop: keep it in your vegetable crisper/hydrator drawer, and it can last for weeks!
Keeping it for too long will, of course, reduce the ‘crunch’ of the head and it won’t be as fresh, but that cabbage is still good to use in recipes.
Before storing, make sure to inspect the heads carefully for any hidden insects, worms, or very damaged leaves. It’s best not to wash the head or remove any of the outer leaves if you can help it, as that hastens spoilage, but you don’t want to store a head full of worms in your refrigerator, either!
As for longer storage, turning your cabbage into fermented goods, such as kimchi, sauerkraut, or relish, will dramatically increase its shelf life.
It’s a good idea to go ahead and take those more damaged heads from your harvest and turn them into these preserved, fermented foods right away, leaving the heads in the best condition to be stored whole for later use.