
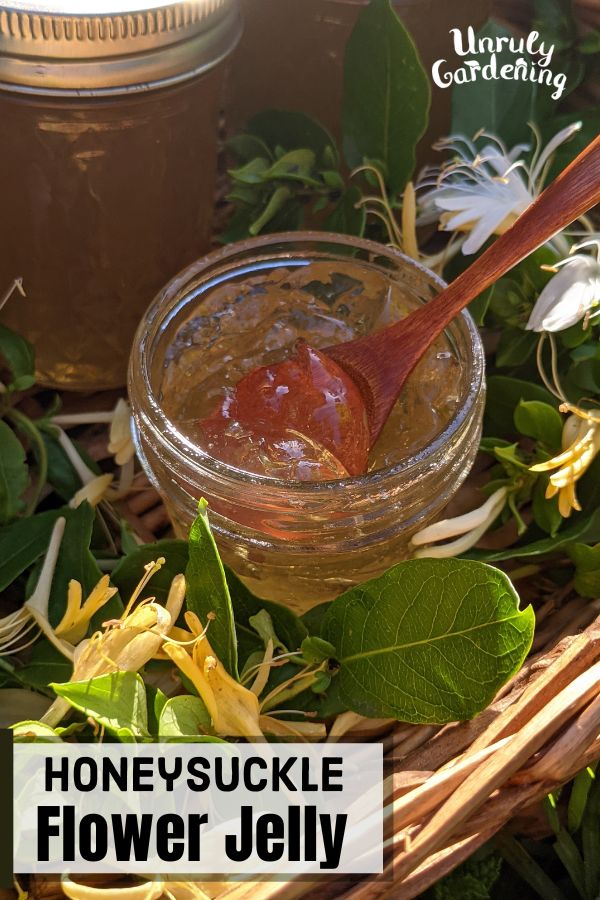
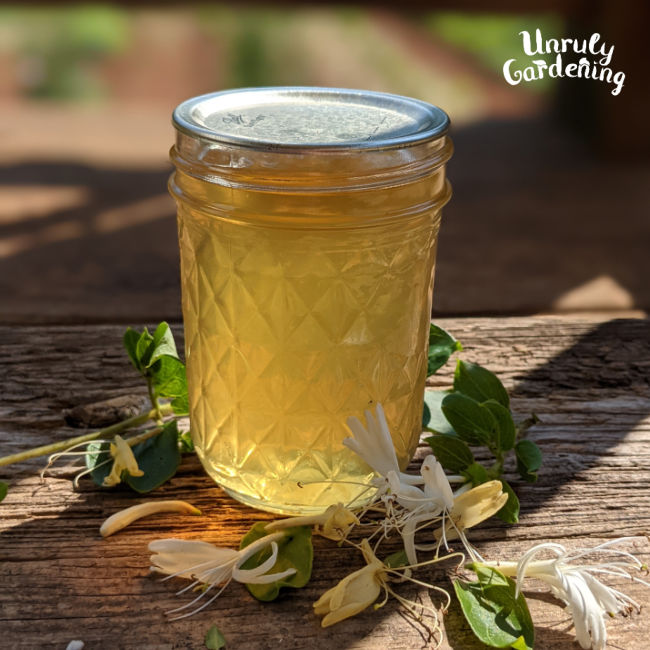
Honeysuckle Jelly
Learn how to make and can honeysuckle jelly. It tastes like the scent of honeysuckle, combined with a light floral sweetness!
Picking & Preparation
Before you can make jelly, first you’ll need to head out and pick flowers for this recipe!
Picking Honeysuckle Flowers
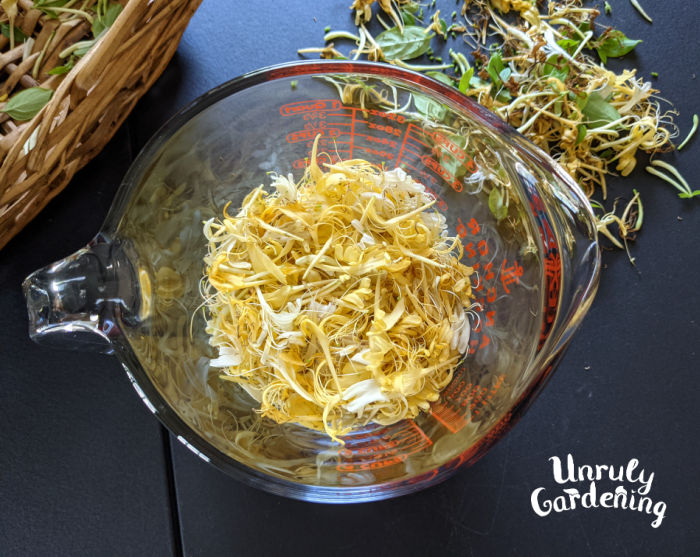
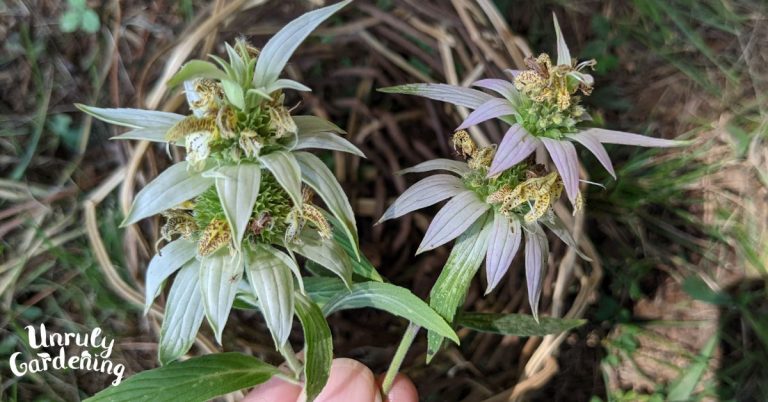
For this recipe, you need 2 1/2 cups of honeysuckle blossoms, preferably collected from Japanese honeysuckle (Lonicera japonica).
Some people use the flowers from bush honeysuckle (also known as Amur honeysuckle, Lonicera maackii), but we prefer to collect from Japanese honeysuckle, which is a vining non-native plant that has been extensively studied for its safety and benefits.
For more about identifying, foraging, and using Japanese honeysuckle, check out our articles:
6 Uses for Honeysuckle Flowers
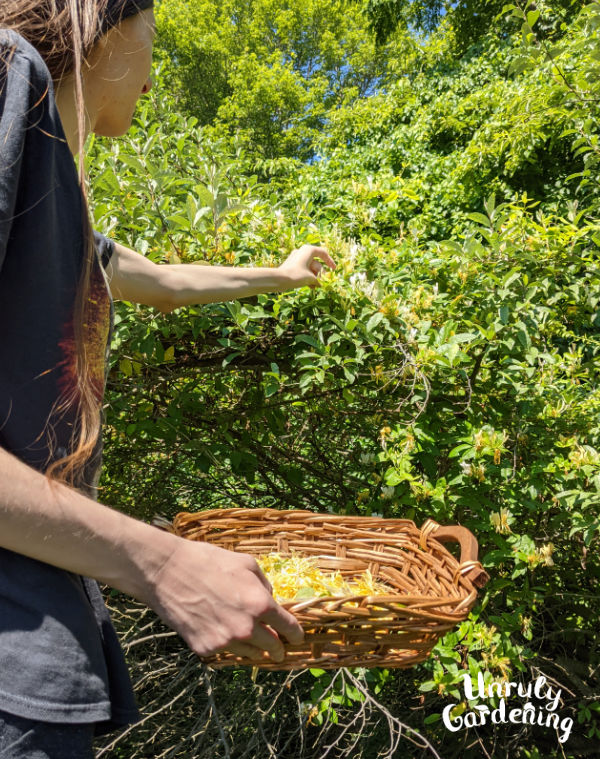
Pick fully opened flowers- both yellow and white flowers are fine to pick, and it’s also okay to include some unopened flower buds. Avoid any flowers that have turned shriveled and brown. Honeysuckle is an invasive vine, so you don’t need to worry about overharvesting.
The flowers will wilt quickly in the heat of the day, so bring them inside and prepare them for jelly-making as soon as possible after picking!
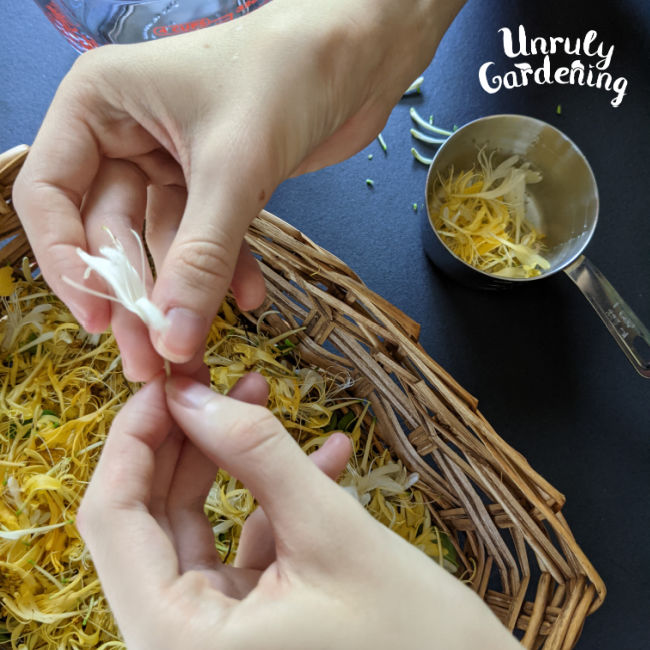
Preparation
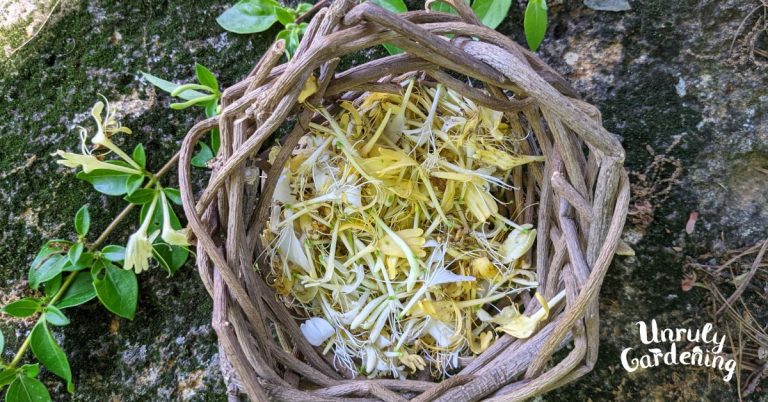
Prepare the honeysuckle flowers by using your fingernails to pop off the green tips at the base of the flowers.
This doesn’t mean breaking off the end of the flower- it’s literally just removing the tiny green tip at the base of the flower. It should pop off easily enough if you get at it with your thumbnail. This will take a few minutes, but just keep piling the flowers that have been de-greened into your measuring cup as you go, and you’ll be done before you know it!
(This step isn’t strictly necessary, since that green part is also edible. Some feel that it improves the final flavor of the jelly if you remove the green part.)
Once you have all of your honeysuckle flowers prepared, it’s time to move onto the next step- brewing up a few cups of honeysuckle tea.
Infusing
To make our honeysuckle jelly, first we’ve got to make a batch of honeysuckle tea! Since flowers don’t have juice like how fruits such as peaches or strawberries do, alternate methods have to be taken to make them give up their flavor in a liquid form, which then allows them to be mixed with pectin and sugar to turn into a sweet spread.
Make sure to keep in mind that this tea is going to need 12-24 hours to steep before you can use it- in order to make a flavorful jelly, you have to make a strong honeysuckle infusion, and that takes time.
To make the flower tea, you will need:
- 2 1/2 cups fresh honeysuckle flowers, green bases removed
- 3 cups water
- a large pot
- a large heat-safe container
- a fine mesh strainer (or a colander lined with several layers of cheesecloth to catch fine debris)
How to make the tea:
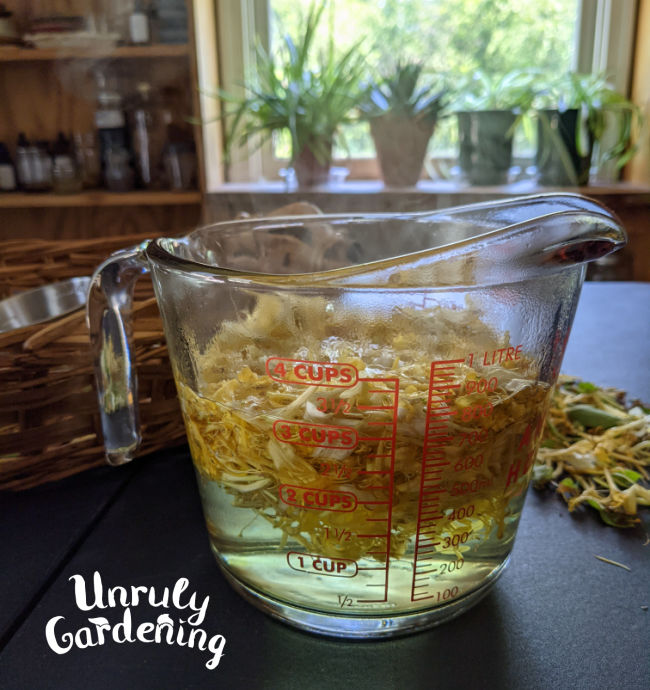
- Place the prepared honeysuckle flowers into your heat-safe container, and set aside. In your pot, bring the 3 cups of water to a simmer.
- Pour the hot water directly over the flowers. Follow up by giving them a quick stir, making sure all the flowers get a chance to be exposed to the hot water. Cover loosely, and set this aside to steep for a while.
- Steep for 12-24 hours. The jelly in the photos shown was make with tea steeped for roughly 18 hours. You can leave the container on your counter for up to 2 hours, but you should move it to your refrigerator after that for the rest of the steeping time, so it won’t spoil. Leaving it out too long may also affect the taste of the finished jelly, so make sure not to forget it!
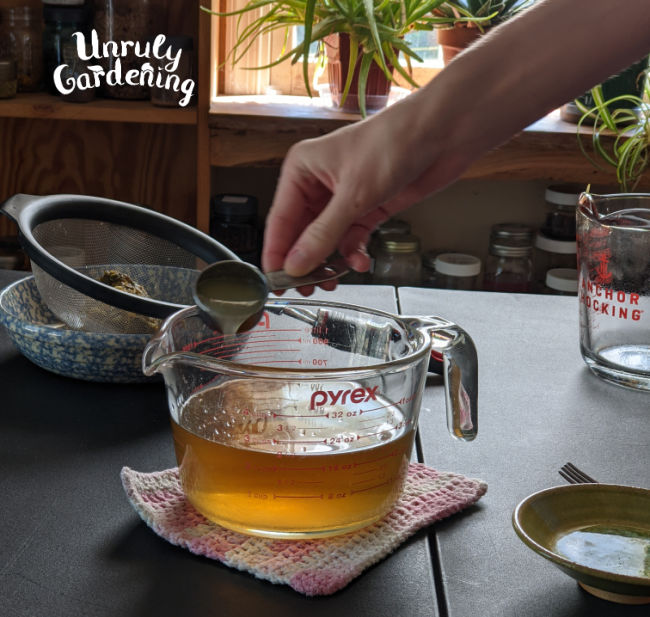
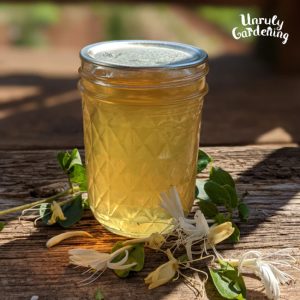
- After the steeping time is over, the liquid should be a strong golden yellow color. Strain out the flowers, keeping the liquid. You should end up with about 2 1/2 cups of the infusion/tea. Make sure to squeeze the liquid from the flowers before you discard them- you don’t want to waste a drop!
- Use this tea immediately to make jelly, or freeze it for use at a later time in a tight-sealing, freezer-safe container. Frozen tea may be kept for up to 3 months in the freezer.
How to Make Honeysuckle Jelly
Ingredients
- 2 1/2 cups of honeysuckle flower tea
- 2 tbsp lemon juice (about the juice contained in 1 medium-large lemon)
- 1 pack Sure Jell low or no sugar powdered pectin (1.75 oz pink box)
- 2 1/2 cups sugar (this recipe uses white cane sugar: alternative sweeteners may affect color and set of jelly)
- Optional: 1/2 teaspoon butter (to reduce foaming: add at any point during the cooking process to reduce foam)
- Heavy-duty 6-8 quart pot or stockpot
- Water bath canner & rack
- Canning jars (recipe makes between 3 1/2 to 4 half-pints – depending on how much liquid evaporates when you cook. This is equivalent to about 7 to 8 four-ounce small jelly jars) with fitting canning lids and rims
- Jar lifter
- Ladle
Instructions to Make the Jelly
Before you begin:
If you are canning your jelly, you will need to start your water-bath canner before beginning.
Wash out your jars to make sure they’re completely clean, and put them in the water bath canner as it warms to sterilize. When the water comes to a boil, make sure to boil them for at least 10 minutes before using. Or, for a more hands-off method, you can simply run your jars through your dishwasher’s sanitize cycle, timing so it ends and the jars are still hot when you’re ready to ladle out your jelly.
Either way, make sure your water-bath canner is full of boiling water to the appropriate height, and will be completely ready to use as soon as you’ve filled your canning jars. You don’t want a canner full of cold water when you’ve got jars of hot jelly that need processing!

Cooking the jelly:
- Pour the tea into 6-8 quart stockpot. If you’re using tea that was frozen for later use, either thaw it out in your refrigerator for a day until it’s liquid again, or to speed up the process, just drop the frozen tea in a pot over a low burner and heat it until it’s fully melted back.
- Add the 2 tablespoons of lemon juice to the tea and stir. This won’t change the color much, but it does shift it a little. Set aside.
- Measure 2 1/2 cups of sugar into a bowl. From this bowl, scoop out 1/4 of a cup of sugar, and set the bowl (which now has 2 1/4 cups of sugar in it) aside. Place that 1/4 cup of sugar in a new bowl.
- Add the packet of powdered pectin to the 1/4 cup of sugar, and stir to combine. Add this to the honeysuckle tea & lemon juice mixture in your pot, and mix. Place on a burner turned to medium high or high heat.
- Stirring constantly with a spoon or whisk, bring to rolling boil. Once it’s reached that point, stir in the remaining sugar all at once. This will stop the boiling for a moment. Return it to a full, rolling boil again, and boil for exactly one minute, still stirring constantly. If you need to add the 1/2 tsp of butter to reduce foaming, do so carefully so as not to splash yourself with the liquid hot-sugar mix. The jelly will boil up vigorously as it cooks – make sure your pot’s big enough to handle it!
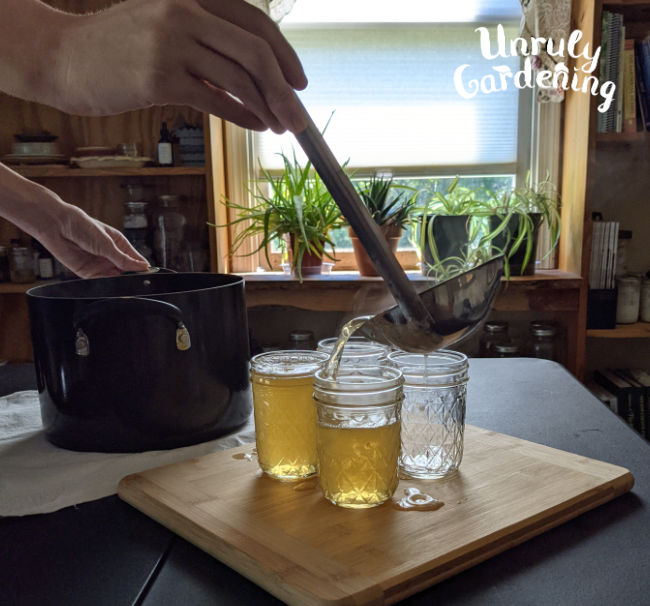
- After one minute, remove from the heat. The jelly will begin to set up fast, so moving quickly (but carefully!), ladle or pour the hot jelly into your sterilized jars, leaving a 1/4 inch headspace at the top if you’re canning. Some air bubbles or a film might form on the top surface of jelly – you can skim those off, if you’d like.
- Wipe off the rims of the jelly jars with a damp rag to remove any sticky spots of spilled or splashed jelly that could interfere with sealing.
- Place the lids on top of the jars, and secure in place by firmly screwing on the rings.
If you are not canning your jelly, leave it where it is for the next 12 to 24 hours to cool and rest. After that, move your jelly to your refrigerator, where it will keep for about 3 weeks. Use it up before then, or freeze for several months.
If you are canning your jelly, then read on!
How to Water Bath Can Honeysuckle Jelly
Preparation
Before you made your jelly, you should have had your water bath canner filled with water and brought to a boil, ideally with the jars you planned to use to can with set inside to heat and sterilize. The water bath canner should have enough water inside of it that it will cover all of your jars with at least 1 inch of water.
The jars inside your canner should be set on the wire rack included in the canner, with the uncovered mouths of the jars facing up. The jars themselves should be completely filled with water. By setting them like this in the canner and bringing the water inside to a hard boil, allowing it to boil for at least 10 minutes, the jars will be sterilized from their hot-water bath, and nice and hot when you pull them out.
When the jelly is ready to be ladled into jars, remove your canning jars from the water bath canner, dumping out the water inside back into the canner, and place the hot jars onto a towel. Leave the water bath canner as it is- don’t turn off the heat.
Filling & Canning
Follow the instructions above for filling your jelly jars and securing the lids and rings. Make sure to check that the rings are firmly secured.
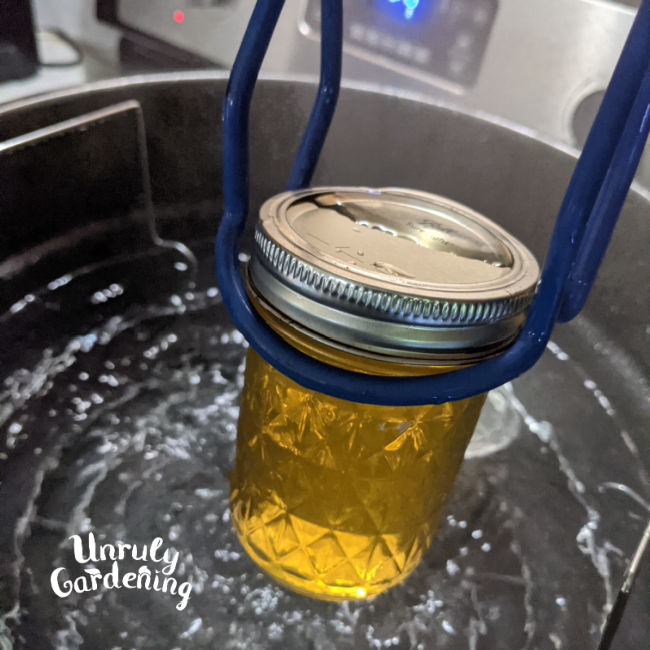
Once filled and completely secured, lower the jars carefully one-by-one into the water bath canner with a jar lifter. Once all jars have been submerged (make sure they’re covered by at least 1 inch of water) cover with the water bath canner lid.
Bring the water inside back to a full boil. Process the jars in the water bath for 10 minutes.
After these 10 minutes of processing, turn off the heat, remove the lid, and lift the jars out from the water bath canner. You can use a jar lifter, or carefully lift out the entire wire rack by the handles. Whatever you choose, be careful! The water is boiling hot, and so are the jars- make sure not to burn yourself!
Let Cool
Place the jars on a folded towel to catch the water. Leave them there to cool, undisturbed, for 12-24 hours. You might hear some popping noises, even as you pull the jars out the water, maybe after they’ve been sitting a while- that’s a good thing! That ‘pop’ is the sound of a successfully sealed jar.
After a day or after sitting overnight, your jellies will be completely cooled. Store them away in your pantry or storeroom as desired. Unsealed jellies that didn’t have their seal take need to be stored in the refrigerator, and should be used within 3 weeks.
(Tip: Remove the rings before storing jars of jelly so they won’t get rusty!)
Shelf Life & Storing Honeysuckle Jelly
Successfully canned honeysuckle jelly is shelf stable and will remain good in your pantry or storeroom for 1 year.
Once the seal is broken and the jar is open, store the jar in your refrigerator. Use within 3 weeks of opening.
FAQs
What does honeysuckle jelly taste like?
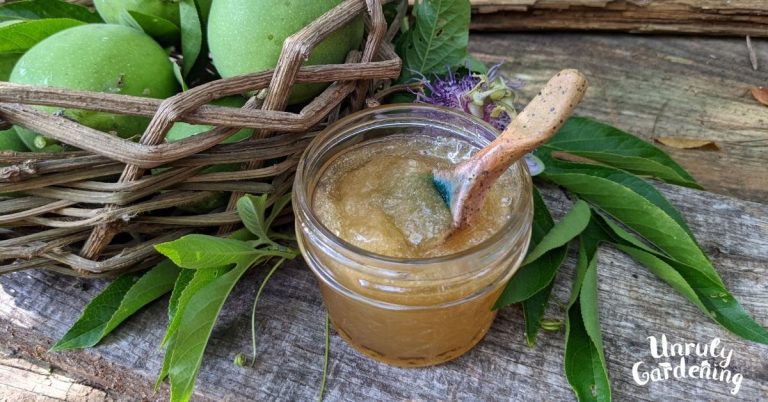
The flavor is a lot like the scent of the flowers. It’s sweet with a light hint of honeyed floral/flower tones!
Do I have to use white sugar? Can I use honey/other alternative sweeteners?
We haven’t tried any other sweeteners with this recipe, but you are of course free to experiment! While we’ve made other jellies using honey and Ball’s low or no sugar needed pectin in the past, we’ve only made this recipe with white sugar, so can’t be certain how alternative sweeteners will work out.
If you do decide to try switching out the white sugar, be aware that it’s possible the jelly might not set up well, or it may change the finished color.
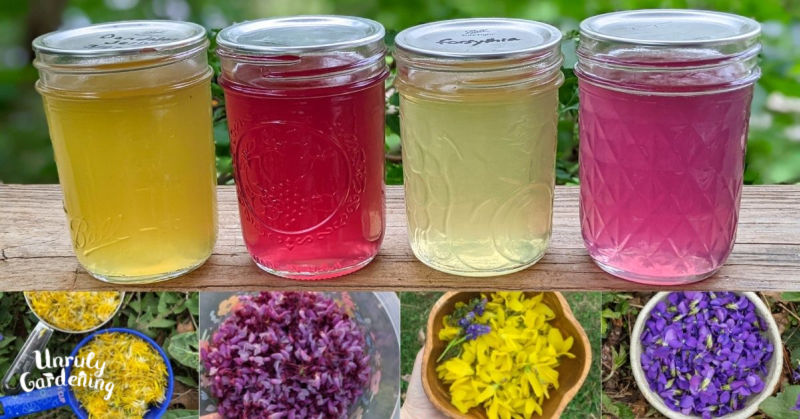
Do you have any other jelly recipes that use flowers?
Yes, we do! Check out our Edibles category right HERE to browse through our various food recipes – which, at the time of writing this post, features several floral jelly recipes for you to make and enjoy including:
- Black Locust Flower Jelly
- Violet Flower Jelly
- Dandelion Flower Jelly
- Strawberry Rose Freezer Jam
- Redbud Flower Jelly
- Maypop Jam Recipe
- Autumn Olive Jelly
- Kudzu Flower Jelly
- and more!
We have many more jellies, jams, and other recipes planned for the future as time goes on and the seasons bring us more things to harvest and forage- so if you’re interested in those kinds of things, keep an eye out, and check back on us often!
Our articles are for information and idea-sharing only. While we aim for 100% accuracy, it is solely up to the reader to provide proper identification. Be sure to seek out local foraging classes and plant walks, and invest in mushroom and foraging guides suitable for the area you live in, since some wild foods are poisonous, or may have adverse effect.
[print-me target=”body”/]
Honeysuckle Jelly Recipe
Equipment
- a saucepan for boiling water
- heatproof pitcher or container, for infusing the flowers
- a strainer, to strain the flower infusion
- set of measuring cups
- 1 tablespoon measuring spoon
- heavy-duty 6-8 quart pot or stockpot
- a bowl that will hold 2 1/2 cups of sugar
- an equal sized or slightly smaller bowl, for the pectin
- 4 half-pint jelly jars, with their lids and rings
- ladle, for spooning hot jelly into hot jars
- water bath canner with rack, if canning your jelly
Ingredients
For the honeysuckle flower tea
- 2 1/2 cups honeysuckle flowers, with the green ends removed
- 3 cups water
For the honeysuckle flower jelly
- 2 1/2 cups honeysuckle flower tea infusion that has been steeped for 12 to 24 hours
- 2 tbsp lemon juice
- 2 1/2 cups sugar
- 1 pack Sure-Jell no or low sugar needed pectin (1.75 oz pink box)
- 1/2 tsp butter – optional, to add at any point during cooking to reduce foam in your jelly
Instructions
To make the honeysuckle flower tea
- Bring 3 cups of water to a boil in a saucepan.
- While the water heats, place the honeysuckle flowers into the heatproof container or pitcher.
- Stir briefly and cover with a lid or saucer.
- Steep for 12-24 hours. We made the batch shown with tea that was steeped for 18 hours.
- After 1 to 2 hours of steeping at room temperature, move the container to the refrigerator to finish infusing, so it won't spoil.
- After the desired infusing time, strain the flowers out of the tea. The tea will be a deep golden yellow color.
- Use the tea right away to make jelly, or refrigerate for 24 hours, or freeze for longer storage.
To make the honeysuckle jelly
- If you're water bath canning, start heating the water in your canner.
- Heat your jars by keeping them in the water bath canner, a pot of boiling water, or your dishwasher set to sanitize cycle. (You want them hot when pouring in hot jelly, or they could crack.)
- Add 2 tbsp lemon juice to the flower tea.
- Pour the tea and lemon juice mixture into the pot.
- Measure 2 1/2 cups of sugar into a bowl.
- Scoop out 1/4 cup of that sugar and place it into a new bowl.
- Add the pack of pectin to the smaller bowl of sugar (containing 1/4 cup) and stir well.
- Add the pectin, mixed with the 1/4 cup sugar, to the flower tea and lemon juice in the pot.
- Turn the burner to high heat and stir constantly until the mixture reaches a full rolling boil.
- Add the remaining sugar and return it to a full rolling boil, stirring constantly.
- Boil for one minute, still stirring constantly. The jelly will boil up significantly at this point.
- After one minute, remove the pot from the heat.
- Working quickly but carefully, remove the hot jars onto a towel, and ladle or pour the hot jelly mixture into them.
- If you plan to water bath can your jelly, leave a 1/4 inch headspace at the top of each jar.
- Wipe the rims with a damp paper towel, to remove any sticky bits of jelly that might interfere with the jars sealing well.
- Cover the jars with their lids and screw the rings on firmly.
- For longer storage, you can optionally water bath can your jelly.
To water bath can the jelly
- After filling the jars and placing the lids and rings on them, carefully lower them into the hot water of a water bath canner. (Use a canning rack if available, or a canning jar lifter.)
- Cover the canner with its lid and heat the water to a boil over medium high heat.
- Boil the jars, with the lid on the canner, for 10 minutes.
- After 10 minutes, remove the lid carefully, and remove the jars. (Be careful of the steam when you open the lid – it's hot!)
- Place the jars on a towel and leave them undisturbed for at least 12 to 24 hours.
Shelf life
- Store any jars that failed to seal in the refrigerator and use within 3 weeks.
- Successfully sealed jars are shelf-stable and can be stored for 1 year. Once opened, refrigerate and use within 3 weeks.


I really live this jelly and have made it several times. This year I was unable to get to the flowers but noticed more are coming up. Ca I freeze them until I get the amount needed for the recipe
Hi Lydia, So happy to hear you like the recipe! Yes, you can freeze the flowers until you have enough. We’ve done that before – collecting some over the time frame of about a month – and it works great.
We use a small lidded plastic container (or empty yogurt container) to gently lay the flowers in, so they don’t get crushed in the freezer while we’re collecting enough to use.
My honeysuckle juice was yellow when I put it in the refrigerator and now it’s green. What can I do?
Hi Lisa! Did you leave some of the green ends on your honeysuckle flowers? If so, that may have impacted the color.
As long as you didn’t leave the juice in the fridge too long (more than a day or so), then I suspect it’s probably still okay to use.
hello my name is maurine my honey suckle tea for my jelly. turned a green color I allowed it to set out 2 hours and placed in fridge foe about 27 hours. how do I know its ok to make jelly . I no the jelly will be a green not golden. I just don’t want to waist the sugar on trial run. thanks in advance
Hi Maurine! Is it possible that you left some of the green ends on the honeysuckle flowers? That’s the most common cause of the tea turning green.
Or if you took off the green ends – do you know what type of honeysuckle you used – Japanese, Coral, Amur bush honeysuckle, etc? We always use Japanese Honeysuckle, so perhaps different varieties cause the color variation?
If you did leave the green ends on the flowers, you can still use the juice to make your jelly.
Once you add the lemon juice, the color of the tea usually improves, so one thing you could do as a little test before making a whole batch, is take a little extra tea & pour into a clear glass and mix a little bit of lemon juice with it and see if the color changes/improves.
If you make your jelly, I’d love to hear how it goes!
I am completely surrounded by honeysuckle. I normally would make wine from them but I wanted something I could have whenever I wanted. I left a few with the green stems but the majority were young yellow flowers. The Jelly is a hazy yellow much like the fresh flowers. I will be giving my Mom a jar for mothers day. The jelly has a subtle flavor that is very good. I think I will add a couple of cherries to steep in the tea for the next batch.
Thanks
Keith
Hi Keith, So glad you like the honeysuckle jelly recipe! What a nice gift idea for your mom.
And I also love your thought of steeping a few cherries in for your next batch – great idea!
Made both the tea and jelly over the last couple of days! The jelly was 5 stars, soooo good and pretty sweet (makes sense when it’s just sugar and water essentially), but the honeysuckle flavor was beautiful.
I do have to say the tea was pretty bitter and I’ve seen that maybe using a boiling water steep brings out more of the bitterness compared to a cold water steep, so I might try cold water next time. I’ll save the recipe for the jelly though!