
Foraging & Using Solomon’s Seal (Sustainably)
Learn how to identify and sustainably harvest Solomon’s Seal (Polygonatum biflorum), then how to turn it into a tincture. We’ll also cover how to cultivate Solomon’s Seal in your garden or on your own land!

Solomon’s Seal (Polygonatum biflorum) is a perennial woodland herb that’s native to the Eastern United States and Canada. It’s also called True Solomon’s Seal, or Smooth Solomon’s Seal. It’s often confused with False Solomon’s Seal (Solomon’s Plume), but in this article, I’ll clarify the differences.


Notes for Foragers
While we have an abundance of Solomon’s Seal (and its look-alike, False Solomon’s Seal) growing where we live, that’s not the case everywhere.
In many places, Solomon’s Seal and its treasured woodland companions (American Ginseng, Black Cohosh, Blue Cohosh, and more) are getting crowded out by invasive plants, and entire woodland ecosystems are getting destroyed by strip logging and land development.
This plant could easily be overharvested. So, while I’m sharing the instructions to mindfully and sustainably harvest Solomon’s Seal in limited amounts and in a way that won’t kill the plant, it’s even more ideal (and not hard!) to grow your own. See more about doing that, below!

Usual foraging rules apply:
Only harvest from your own land, or private land you have permission to be on, avoid any areas that may have been sprayed with herbicide or pesticide, be 100% certain of ID, do not gather if there’s only a few plants in the area, and leave the majority of plants untouched and unharvested so they can continue to grow and spread.
Identifying Solomon’s Seal
While Solomon’s Seal does have a couple look-alikes, it’s a pretty easy plant to recognize when it’s in bloom.
Flowers
The white flowers grow in pairs, originate from the leaf axils, and dangle down from underneath the stalk and leaves. You’ll probably have to do some crouching and leaf turning in order to find the flowers!

When the plant is finished blooming, the “Y” shaped flower stems can still be found on the plant for a long time. So if you look under the leaves and see those little flowerless stems on the bottom – you’ll still know that you’ve found a true Solomon’s Seal plant.
Here’s a Solomon’s Seal in September that has lost all of its leaves, but you can still see the “Y” shapes where the flowers and berries were.

The berries are blue-black and are considered toxic – don’t eat them!
I’ve been trying to get photos of the berries for a couple years now, but the wildlife keeps beating me to them. As soon as I get a good shot, I will update here!
In the meantime, there’s a great photo of Solomon’s Seal berries if you scroll through the gallery over at the North Carolina Extension site – Polygonatum biflorum.
Leaves & Stem
The leaves alternate and they grow right against the plant’s main stem. You should also see only one main plant stalk – if the plant is branching, then you don’t have the right one.

The leaves feel very smooth to me (compared to False Solomon’s Seal) – here’s a photo of the back of the leaves.

Rhizome (Root)
While you see a lot of references to Solomon’s Seal “Root” (and I call it that too!), it’s actually a large fleshy rhizome, with small fibrous roots coming from it.
Regardless of what you call it, the rhizome (root) is white once it’s all cleaned up. (In contrast, False Solomon’s Seal has a more yellow or golden tint.)

Solomon’s Seal Look-Alikes
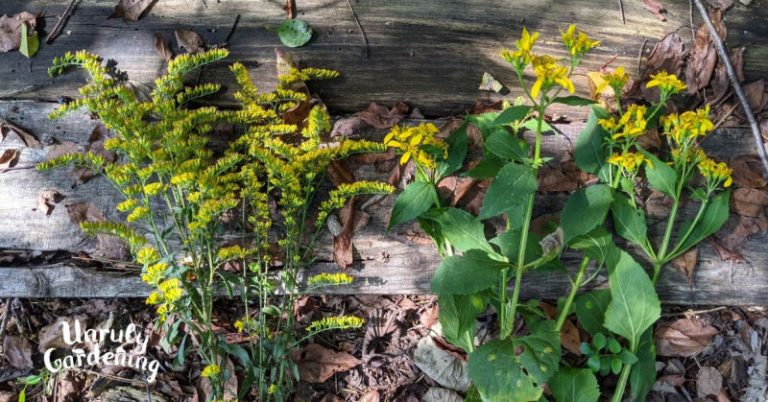
There are three look-alikes that are good to be aware of. False Solomon’s Seal is almost its twin, except when the plants are blooming. Bellwort looks different, but could be confusing for some, and Lily of the Valley looks quite different once it has fully opened up, but it’s good to know what the shoots look like.
False Solomon’s Seal (Maianthemum racemosum)
Also called Solomon’s Plume – False Solomon’s Seal is a very similar plant and can actually be used in a similar way. (The young shoots can be eaten and the root can be used medicinally.)

It’s easy to tell Solomon’s Plume when it’s blooming. The white flowers grow from the end of the plant’s stem. Later in the year, green berries form where the flowers were, then they turn red. These red berries are edible, but remember that true Solomon Seal black-blue berries are toxic.
They bloom at the same time as True Solomon’s Seal, so take advantage of that and try to frequently rub the leaves of both plants and you will train yourself to feel the differences between the leaves. Solomon’s Plume (False Solomon’s Seal) feels slightly rougher to me, and if you flip a leaf over and rub it, the back has a shiny gleam to it that true S.S. doesn’t.

It’s also good to know that False Solomon’s Seal, or Solomon’s Plume, has rhizomes (sometimes called roots) that are more yellow or golden colored than the whiter tone of true Solomon’s Seal.

Bellwort (Uvularia perfoliata)
This pretty little wildflower is native to forests in the Eastern United States. It’s also called Merrybells or Mohawk Weed.
Unfortunately, it’s getting pushed out of its native areas by invasive plants (garlic mustard, kudzu, bittersweet, multiflora rose, autumn olive, bush honeysuckle, and more) so is getting harder and rarer to find.
The flowers of bellwort are different in that they’re loosely petaled and yellow.
You can also tell by looking at the leaves – the stem looks like it’s poking right through the bottom of each leaf.

Here’s an even closer view to see how Bellwort stems “stab” right through the leaves:

Bellwort shoots are sometimes cooked, similar to asparagus, and the roots can be cooked and eaten, however, I’ve not personally tried this as I rarely can find this plant on our land, so consider them a no-pick flower.
Lily of the Valley (Convallaria majalis)
The young shoots emerge about the same time that Solomon’s Seal shoots poke from the ground. It’s vital to be able to recognize Lily of the Valley shoots, since it’s quite the toxic plant.
Even as a small shoot, you’ll be able to see tiny little flowers on Lily of the Valley.

If in doubt about whether you are looking at a Lily of the Valley shoot, or a Solomon’s Seal shoot – don’t eat it! Leave the plant alone and move on to more recognizable things. Even better, grow your own Solomon Seal plants so you can first-hand see how they grow, flower, and fruit each year.

Where It Grows
Solomon’s seal is a woodland plant that likes shady areas and mixed hardwood forests.
We mainly find it growing in abundance near our creeks, but also in a few isolated patches in shaded forested areas without water features. It’s native to the Eastern United States & Canada.

How to Grow Solomon’s Seal at Home
Whether you have an abundance of forested land, or a small shady spot in the corner of your backyard, you can grow your own plants at home.
Check reputable nurseries such as Strictly Medicinal Seeds for seeds. I’ve also purchased and planted a thriving mature Solomon’s Seal plant from Monticello’s plant nursery. (We’ve also had success with trillium and Virginia bluebells bought from them too!)
Choosing the Right Spot
Solomon’s Seal often grows in the same areas as American Ginseng, Blue Cohosh, Bloodroot, and Goldenseal, so if you’re scouting out a good area to grow your own – these are good indicator plants that the potential site might be well suited.
The plants prefer rich, moist, humus-laden soils that you’d normally find in a mixed hardwood forest. They also need to be situated in part-shade to full-shade.
The Wild Simulated Method
My favorite way to grow woodland medicinal herbs is by using the wild simulated method. This technique mimics the way the plant would naturally grow in the wild. However, you are providing the seeds or rhizome pieces, to help plants get established.

Find a good spot in the forest, remove any invasive plants that will choke out the baby plants when they emerge (these would include autumn olive, bittersweet vine, multiflora rose, honeysuckle bush or vine, etc.). Rake back the leaf litter, loosen the soil with a small hand tool, then plant rhizomes/root cuttings about 3/4″ to 1″ below the soil (not too deep!), or seeds about 1/2 inch deep. Space them about 8″ apart, but it doesn’t have to be precise. Recover the planting area with the leaf litter that was there, adding a bit more if needed for good coverage.
You can also sow the seeds individually in pots, using the Winter Sowing Method, then plant them out in a shady spot once they’re bigger. Be aware that Solomon’s Seal seeds are double dormant, which means they need to spend two winters outdoors.
Related Article: How to Winter Sow Native Plants

Harvesting Solomon’s Seal Root (Rhizome)
The key to sustainable harvesting is that we are only collecting a portion of the rhizome, and leaving most of it behind so the plant lives on continue growing and multiplying.
At no time do you need to dig up the entire plant from the dirt.
When to Harvest
Traditionally, fall is the time when roots are harvested. However, some people who harvest on a small scale for personal use (including myself) harvest earlier in the year, when you can still see the plant size and ensure you’re working with a mature enough Solomon’s Seal. You could instead, find the plants you want to harvest in late spring/early summer, mark them with a flag, then go back in the fall to retrieve some rhizome ends from them.

How to Harvest & Dry Solomon’s Seal
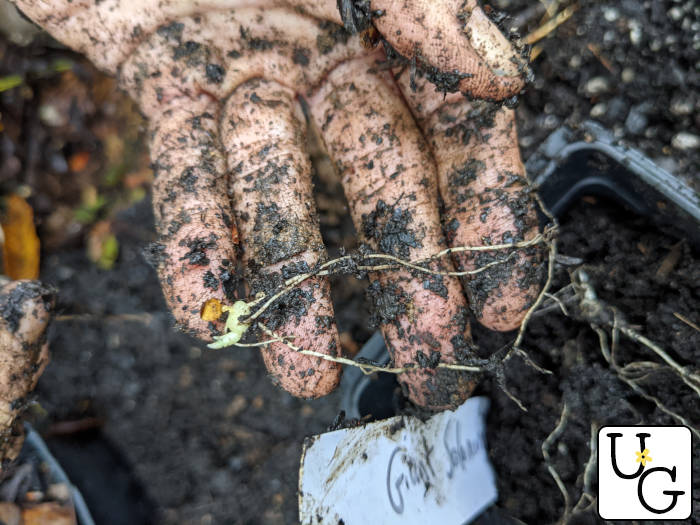
To sustainably harvest the rhizome and root portion without killing the main plant, you’ll want to carefully dig around the base of a Solomon’s Seal plant until you see the rhizome. This usually isn’t very far down into the ground. You can often use your fingers or a small nearby stick or rock to do this.
Continue carefully uncovering the dirt as you follow the root (rhizome) horizontally, but don’t pull the plant from the ground.
Once you’ve uncovered the entire rhizome, you can cut off about 1/3 of the farthest part – this is the oldest piece where less growth is happening, so it’s perfect for us to use.
Wipe off loose dirt in the field, then wash thoroughly with clean water once you get home. It’s best to use them right away, but if you get delayed, you can store the unwashed rhizome pieces in the fridge for a day or two.
Turn the roots into a tincture while fresh, or thinly slice and dry if you plan to infuse them into oils and salves.

Dehydrate sliced roots at 105 degrees, start checking small amounts after 6 to 8 hours, then check every hour or two thereafter. Larger roots and larger amounts will take longer.
Once dried, store them in breathable brown paper bags in a cool, dark area; try to use within 6 months. The roots hold onto moisture easily, so be careful about not storing them too airtight or they could mold.

Uses for Solomon’s Seal
While the young shoots can be eaten in spring, Solomon’s Seal root is more often used for its herbal benefits, specifically for irritated gastrointestinal systems and joint problems such as stiff, sprained, or sore shoulders, knees, or other spots that get repetitive stress injury.
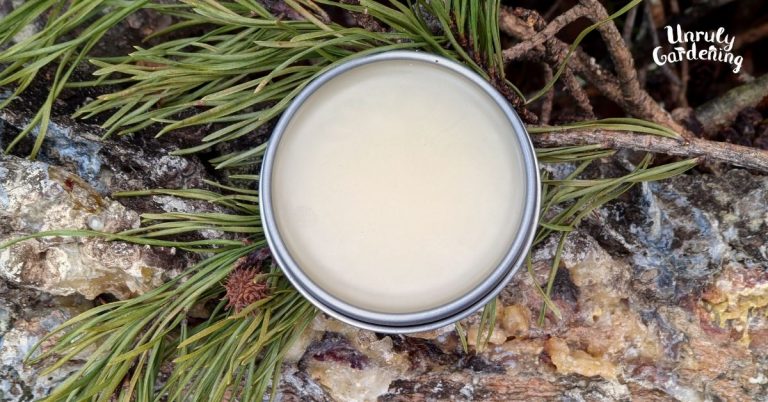
You could also thinly slice and dry the root, infuse it in oil, and use in pain salves. If you don’t have plants at home, then ideally you’d purchase organically cultivated Solomon’s Seal instead of using a wild limited supply because of the higher amount of plant material needed. (Organic cultivated Solomon’s Seal can be purchased from Mountain Rose Herbs.)
Note that the roots of False Solomon’s Seal (Maianthemum racemosum) can be used in the same way and may be helpful if your joint pain also involves nerves.
Solomon’s Seal Tincture
This tincture is super easy to make and follows standard folk tincture making practices. You’re aiming for a ratio of 1 part chopped root to 2 parts alcohol. For example, if you have 1/4 cup chopped root, use 1/2 cup alcohol.
Or, for a more formulaic method: Use 1 part chopped root (by weight) to 2 parts alcohol (by volume). So if your chopped root weighs 10 grams total, then use 20 ml high proof alcohol. Make sure the alcohol fully covers the herb, if not, add more until it’s completely submerged.
You can use the tincture internally, or rub on your skin externally.
To make the tincture:
Place washed and finely chopped fresh Solomon’s Seal root into a small jar and cover with twice as much high proof alcohol. (I use 151 proof Everclear, or 100 proof vodka if Everclear isn’t available.) Place a lid on the jar and tuck it away for several weeks to infuse. Strain with a fine mesh strainer and store the finished tincture in a cool, dark cabinet. Shelf life is at least 1 year.
According to herbalist Matthew Wood, in The Earthwise Herbal Volume II, it’s important to use a high proof alcohol “since the sticky roots cause a sweet syrup if extracted in a low proof sweet alcohol like brandy.”
Try taking 3 to 4 drops of tincture at a time, for 3 to 5 times a day. If needed, you can increase to 15 to 20 drops at a time, 3 to 5 times per day.
References & Further Reading
Crellin, John K. and Jane Philpott. A Reference Guide to Medicinal Plants: Herbal Medicine Past & Present. Duke University Press, 1997. Print.
Groves, Maria Noel. Grow Your Own Herbal Remedies. Storey Publishing, North Adams, MA. 2019. Print.
Native American Ethnobotany Database – entry for Polygonatum. Accessed online June, 2023.
North Carolina Extension – Polygonatum biflorum. Accessed online June, 2023.
Wood, Matthew. The Earthwise Herbal Volume II. North Atlantic Books, Berkley, CA. 2009. Print.
Our articles are for information and idea-sharing only. While we aim for 100% accuracy, it is solely up to the reader to provide proper identification. Be sure to seek out local foraging classes and plant walks, and invest in foraging guides suitable for the area you live in, since some wild foods may have adverse effect.
[print-me target=”body”/]


Hi, thanks for the information. I inherited some Solomon’s seal from my dad not knowing until well afterward that it was medicinal. I don’t have enough of the rhizome yet to tincture but have been looking into buying some for my husband. I see quite a bit of the powdered root has been roasted. Have you heard of this practice, and do you know if/why it would be beneficial? (Mountain Rose has been out of stock for a while & their’s isn’t roasted!)
Hi Kristen! I haven’t heard of roasting solomon’s seal root – perhaps it’s similar to roasting chicory for making beverages? (Just a guess though!) 🙂
You may want to get a ready-made tincture. Woodland Essence is a place I highly recommend; I’ve used several of their products after seeing them recommended by Stephen Buhner in the past & they are all top notch.
https://woodlandessence.com/products/solomons-seal-root-liquid-root-extract
Thanks! I will check that out. I still haven’t been able to find any info on roasting it! Weird.