Grandma’s Yellow Squash Patties
This recipe for yellow squash patties is quick, easy, and delicious. They’re also super simple to make gluten free!

A family favorite, this recipe comes straight from our late Grandma Tiny’s recipe collection. Our grandpa grew a ton of vegetables in his home gardens, and as a child of the Great Depression, Grandma let nothing go to waste, including overgrown squash!
She called these summer squash cakes, while we call them yellow squash patties, but they’re also similar to squash fritters.
Regardless of whatever name you choose to use – here’s how you make them!

Ingredients you’ll need:
- 2 medium-small unpeeled yellow squash (or enough to make 2 cups grated)
- 1/2 medium onion (enough to make 1/2 cup chopped or grated onion)
- 1 tsp sugar, adjust to taste
- 1/2 tsp salt, or to taste
- dash of black pepper, adjust to taste
- 6 tbsp baking mix or flour (we use Gluten Free Bisquik)
- 2 eggs, beaten
- 2 tsp melted butter
- extra butter for greasing the skillet
Instructions to make yellow squash patties:
Preheat an electric skillet to 375 degrees F, or medium to medium-high heat if using a frying pan over a burner.
Coarsely grate the squash – we use a simple box grater, but you can also shred it with your food processor too. If you’re using the squash right away, you don’t need to drain or squeeze out the liquid.
However, if you’re grating it in advance, place the grated squash and chopped or grated onion in a colander over a bowl and store in the fridge until needed. This will allow any extra squash juice to drain into the bowl.
If your squash is overgrown and seedy, scoop out the bulk of the larger seeds before grating it up.
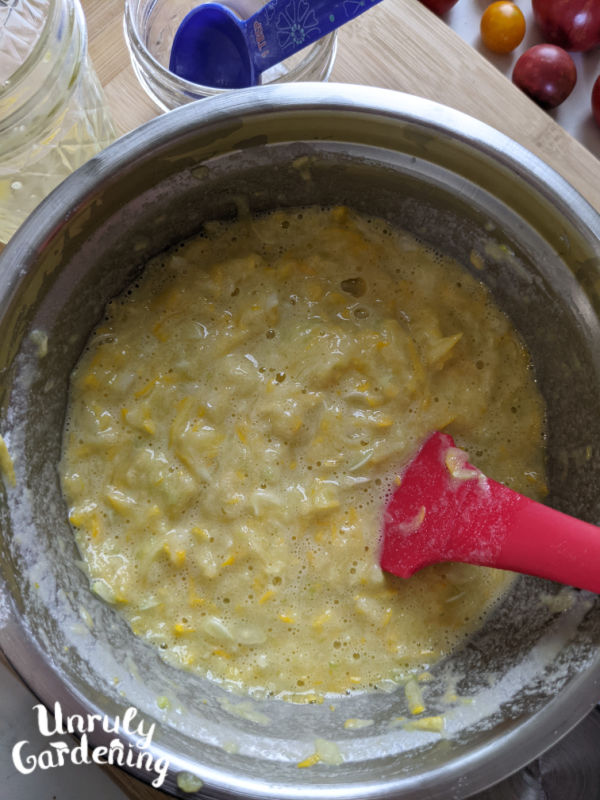
Combine the grated squash and chopped onion together in a bowl. Sprinkle the sugar, salt, pepper, and baking mix/flour on top of the mixture, then stir together. Add the eggs and mix thoroughly. Drizzle in the melted butter and stir for a final time.
Generously rub butter over the surface of the skillet or frying pan. It should be sizzling hot.

Using a tablespoon, drop the squash mixture by the spoonful onto the hot skillet. When you scoop up the spoonfulls, make sure that you’re getting plenty of squash with each scoop.
Fry the patties until golden brown on both sides, flipping a couple times with a spatula, almost as though you were cooking pancakes.
Remove from heat and place on a cooling rack, or on a paper towel lined plate. Serve immediately while piping hot! Avoid stacking, since they can become soggy that way.
Depending on the size you make the squash cakes, this recipe makes roughly 16 patties – or enough to feed our family of 4.
Store extra in the refrigerator for up to 2 days. Squash cakes can also be frozen for a few months, though they really do taste best freshly made!

Recipe Tips & FAQS
Should I drain the squash first?
Most recipes for squash cakes (squash patties) have you drain the liquid from the squash first. However, our grandma Tiny, then our mom, and now us have been making this recipe for a few decades now without doing that step – as long as we are making and cooking the batter immediately after grating.
However, if you grate the squash ahead of time, you should drain it in a colander or use your hands to squeeze out some of the extra liquid or moisture before adding it to your recipe to make sure the batter doesn’t turn out too watery.
How to reheat squash patties:
Place on a microwave safe plate and heat for 10 to 15 seconds at a time, until warmed.

Can you prepare yellow squash pancakes ahead of time?
Yes; just grate the squash and onion in advance and store covered in your fridge for 12 to 24 hours. Mix the dry ingredients together in a small bowl that you set aside until you’re ready to combine everything together. If you do this – be sure to store the squash/onion in a colander that’s been situated over a bowl, since it will start releasing liquid after a while.
What to serve on the side?
One of our family members likes to dip these squash patties in ketchup, while another likes them completely plain. You can also try dipping in ranch dressing, top with a bit of sour cream and chopped green onions, or even try some with salsa.
What can I use instead of yellow squash?
Try using pattypan squash or zucchini instead. The flavor and color will be slightly different, but still yummy!

Grandma’s Yellow Squash Patties (Squash Cakes)
Ingredients
- 2 medium-small unpeeled yellow squash (or enough to make 2 cups grated)
- 1/2 medium onion (enough to make 1/2 cup chopped or grated onion)
- 1 tsp sugar, adjust to taste
- 1/2 tsp salt, or to taste
- dash pepper, or to taste
- 6 tbsp baking mix or flour (we use Gluten Free Bisquik)
- 2 eggs, beaten
- 2 tsp melted butter
- extra butter for greasing the skillet
Instructions
- Preheat an electric skillet to 375 degrees F, or medium to medium-high heat if using a frying pan over a burner.
- Coarsely grate the squash. If using it right away, there's no need to drain it. If you're making ahead of time, let the squash drain in the fridge – in a colander situated over a bowl to catch extra liquid.
- If your squash is overgrown and seedy, scoop out the bulk of the larger seeds before grating it up.
- Combine the grated squash and chopped onion together in a bowl.
- Sprinkle the sugar, salt and pepper, and the baking mix (or flour) on top of the mixture and stir well.
- Add the beaten eggs and mix thoroughly.
- Drizzle in the melted butter and stir it in until the mixture is thoroughly combined.
- Generously rub butter over the piping hot surface of the skillet or frying pan.
- Using a tablespoon, drop the squash mixture by the spoonfulls onto the hot skillet.
- Fry until golden brown on both sides, flipping occasionally for even browning.
- Remove from heat and place on a cooling rack, or on a paper towel lined plate. Serve immediately while piping hot!
- Store extra in the refrigerator for up to 2 days. Squash patties (squash cakes) can also be frozen for a few months, though they really do taste best freshly made!