How to Grow, Harvest & Use Calendula
Learn how to grow, harvest, dry, and use calendula – an herbal flower that’s easy to grow in your garden and has tons of useful benefits!
Calendula’s nickname is pot marigold, but it’s important to note that calendula (Calendula officinalis) is not the same plant as common garden marigolds (Tagetes spp). Check out our article: Calendula vs Marigolds – the Differences, to make sure you don’t mix the two of them up!

How to Grow Calendula
Calendula is an easy to grow annual that produces bright yellow or orange flowers.
It’s so easy in fact, that growing calendula is perfect for new gardeners, or if you’re helping a child plant a small raised bed and would like a high chance of success.
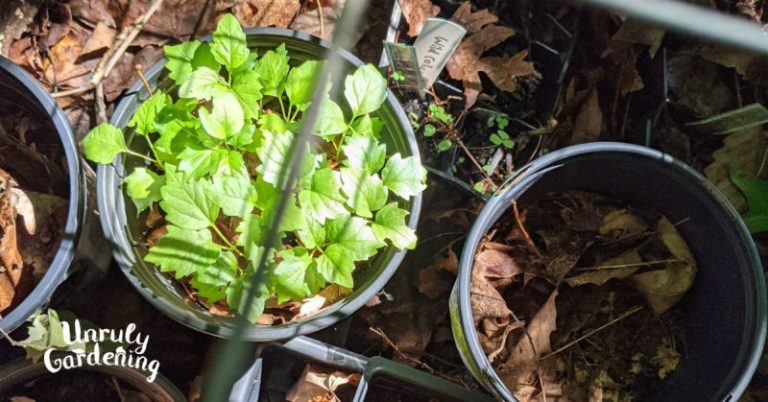
You can either seed calendula directly into your garden, or start it inside to jump start the growing season.

Method 1: Starting Indoors
Start calendula seeds indoors 4-8 weeks before your estimated last frost date. In our area (USDA growing zone 7, Appalachian mountain region), we’ve gotten frost as late as April 22 in the last few years (even though our official final frost date is April 15), so we aim to start seeds indoors between February 25 to March 25.
Fill seed starting trays or containers with your choice of pre-moistened potting soil or seed-starting medium, then plant your calendula seeds about 1/4 an inch deep. Cover with a greenhouse top or plastic wrap, and place somewhere warm and in the light until germination occurs, which should can be anywhere between 4 days after sowing, up to 2 weeks.
Seeds will germinate significantly faster in warm soil. The cooler the soil and your environment is, the longer if will take for the seeds to sprout.

Method 2: Sow Calendula Seeds Directly
Sow seeds outdoors after all risk of frost has passed, planting each seed 1/4 inch deep and roughly 1 ft apart from each other. Water well, and keep evenly moist until germination occurs. Expect sprouts outdoors in 7-14 days.
Just like with indoor-started calendula seeds, the warmth of the soil will effect how quickly the seeds germinate. Warm soil will result in swifter germination, while colder soil can have your seeds quietly sleeping away in the soil for a while, only showing up once the weather has warmed enough to stir them from their slumber.

Transplanting to Outside
Transplant out your indoor-started calendula plants only once they have several sets of true leaves, and all risk of frost has completely passed. Harden off the young plants over the course of two or so weeks.
To harden off baby calendula plants, set their tray outside in a sheltered place for an increasing amount of time each day, starting with an hour or two, then gradually working up until they can spend all day and night outside.
After hardening off, plant the plants roughly 1 ft apart from each other in a location that gets full sun. You may want to mix in a scoop of organic matter (compost) at this stage. Gently, but firmly, press the soil back in place around the plant, and water well.
Odds are, your plants will go limp and droop a bit after being transplanted. While they should bounce back in a day or two, sometimes they still seem to falter and have a hard time adapting. If it’s been several days and your plants still seem like they’re suffering, a very diluted dose of fish emulsion (or another liquid fertilizer) can sometimes be the key to getting them to perk back up.
Try to give them a chance to adapt on their own, first, though. They may just need time- this is a big change for your little plants!

Where to Plant
Simple, humble garden soil without enrichments or amendments is just fine for calendula plants. They’re not picky! Just make sure they have plenty of full sun (though they will tolerate a little shade), and that the soil drains well – meaning that it doesn’t stay a bog for a week after it rains!
However, soil that is strongly acidic or extremely alkaline may require some balancing, if you’ve found that calendula just struggles to grow at all in your garden. Calendula’s preferred pH range is 5.5-7.0. If your soil doesn’t fall within that range, then amend as needed before planting.
Not just for herb gardens, consider planting calendula in your vegetable garden as a companion plant. Calendula can be helpful by attracting pollinators such as bees, butterflies, and the beneficial insects that dine on pests, such as aphids.

Calendula Plant Care
Deadheading spent blooms is vital for continued blooming for calendula. Snapping off the heads before they can form mature seeds will encourage the plant to put out more flowers, prolonging the lifespan of your calendula and giving you a bigger harvest!
Luckily for the herbalist, picking the flowers while they’re still fully blooming also encourages the plant to put out more blooms. So if you’re growing these lovely flowers for your herbcrafting and medicine-making, then feel free to harvest away! Your calendula will respond to your plucking with a shower of sunshine flowers, and so your herb-drying racks swiftly begin to fill up!

Sticky Fingers!
Calendula contains high levels of medicinal resins. This actually means the plant itself is sticky to the touch! These resins get all over your fingers (or scissors/pruning shears, if you don’t pick your flowers by hand), which is a sensation some people particularly dislike.
The resin isn’t harmful – to the contrary, it’s medicinal! That being said, if you absolutely cannot stand to have sticky calendula fingers for another second, it’s pretty easy to get off. Rub a small amount of coconut or olive oil over your hands, then wash off with a dish soap, such as Dawn. You could also choose to wear garden gloves.

Harvesting Calendula
Harvest the fully-open flowers by simply pinching them off the plant with your fingers (or using pruning shears or scissors to clip) right off at the base of the flower.
Ideally, pick blossoms on a dry sunny day, or at least when the flowers aren’t wet from rain or dew.
When possible, harvest the entire flower, rather than just the petals (which are technically ray florets, but usually just called petals!) The green base of the flower contains more of the wonderful medicinal resins than just the petals alone do, which is why you’ll often see whole flower heads used in calendula products.

Drying & Storing
To dry calendula, simply place the flowers on a drying rack or clean dish towel in a single layer, preferably open-flower side down. Place the drying rack/dish towel in a dry location that gets good airflow, but not direct sunlight, and allow the flowers to dry completely.
Once completely dried, transfer the flowers to either a brown paper bag or glass jar with a lid. Store in a cool, dry, dark location and avoid exposure to sunlight as it will fade your calendula.
Shelf life of dried calendula is at least one year, or as long as the flowers retain a good color. Faded flowers have lost their potency and should be composted.

Ideas & Recipes for Using Calendula
Calendula’s myriad medicinal uses means there’s no end of herbal projects out there to make! It’s especially used for soothing skin irritation and inflammation, and conditions such as windburn, sunburn, diaper rash, eczema, and more.
A classic herb, gentle enough to use in salves, ointments, and baths for babies, calendula is even safe to apply on your pets. (The salve makes a great hot spot or paw treatment for dogs.)
It’s an edible flower, so you’ll also find calendula petals sprinkled on salads and used in food dishes, but be aware that you should not eat or ingest calendula if you’re pregnant. (External use is fine though.)
We have many calendula projects on our sister site, The Nerdy Farm Wife, that make use of it. Calendula is a staple in our herb cabinet, and we try to never be without it!
It can be used to make:
- Calendula Tea – has a ton of uses for everyone in the family, from throat gargle to acne treatment and wound spray!
- Calendula Oil & Calendula Salve – create an infused oil then turn it into an all purpose healing salve remedy for diaper rash, scrapes, and more
- Lotion Bars – excellent for dry chapped skin and gift giving
- Bath Melts & Body Butters – for soothing, pampering, and moisturizing dry skin
- Simple Calendula Soap – a mild unscented soap suitable for virtually all skin types
- and more!
[print-me target=”body”/]