
Autumn Olive Jelly
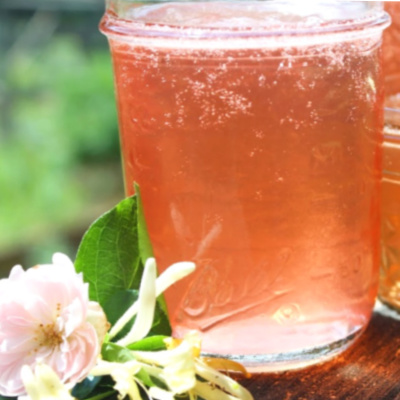
Learn how to make delicious autumn olive jelly!
The flavor is unique and hard to describe, but we think it tastes somewhat like peach or apricot, with a hint of cherry.

Around here, we have acres of invasive plants, including autumn olive, kudzu, Japanese knotweed, oriental bittersweet, and more. It’s a constant effort to keep their enthusiastic growth habits reined in, so that they don’t choke out all of our beautiful native plants.
Mainly, we use a lot of manual labor to keep them contained, but finding as many ways possible to eat and use them up is part of our strategy too!
This autumn olive berry jelly makes good use of a free, and often abundant food source that many of us have growing nearby.
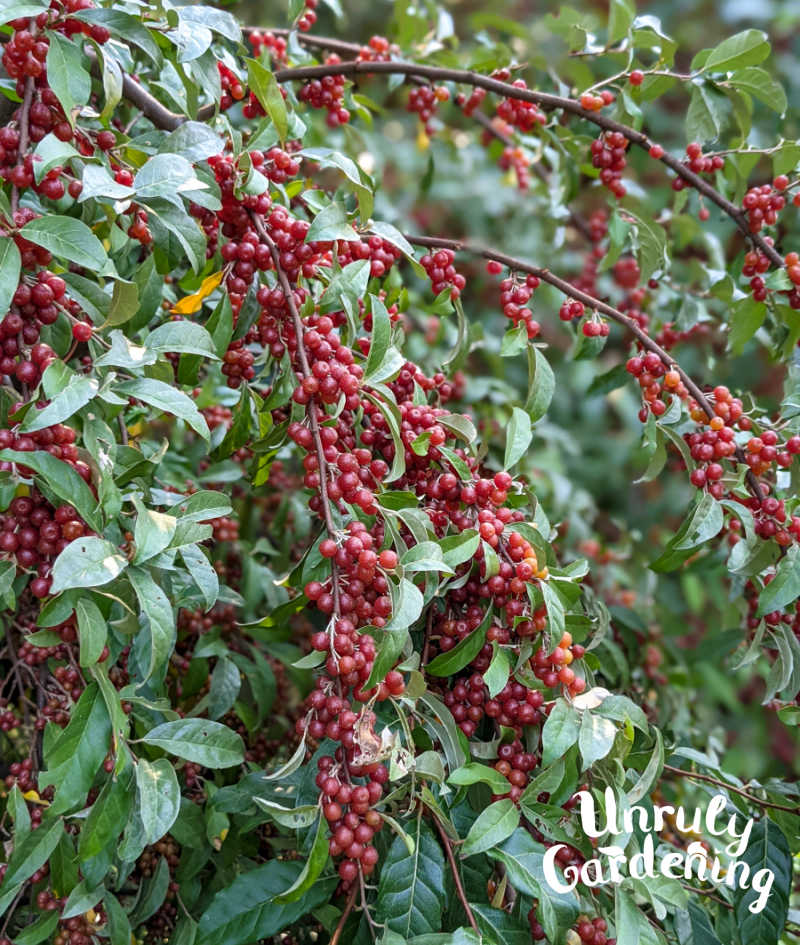
Identifying Autumn Olive Berries
Before you begin – make sure that you’re gathering the correct fruit!
There are a few other red berries that are growing around the same time as autumn olive, including amur honeysuckle and flowering dogwood berries. Some are non-edible, and in some cases toxic, and should not be used for food purposes.
For photos and identifying tips for these plants, please read our article:
Foraging & Identifying Autumn Olive Berries (+lookalikes!)
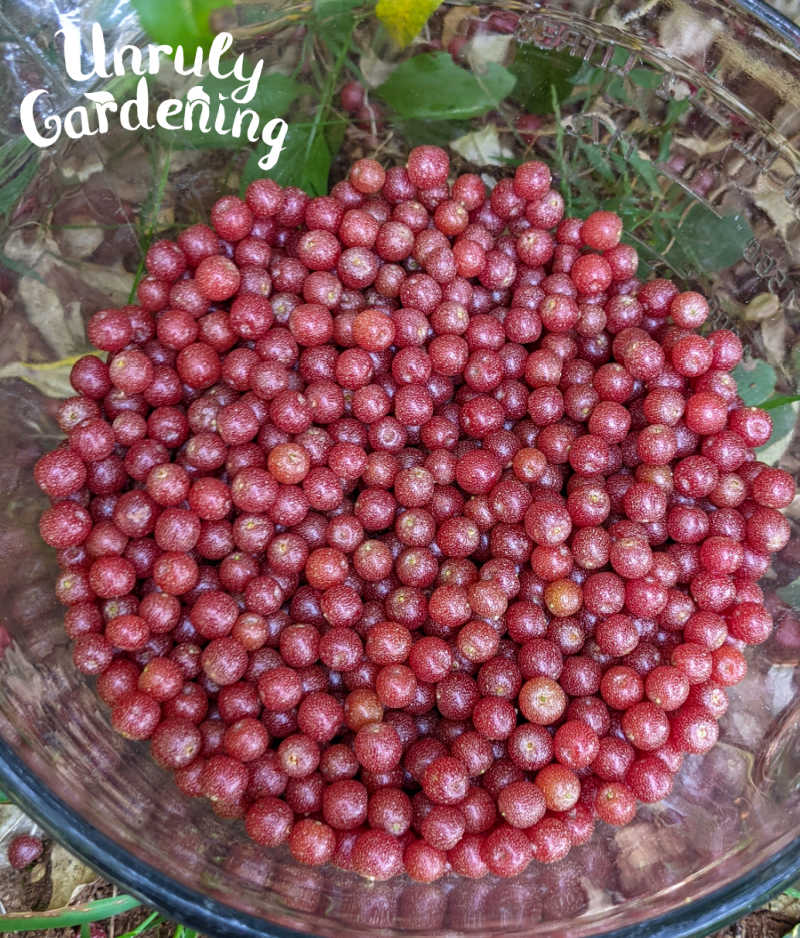
For the jelly, you’ll need:
- 4 cups autumn olive berries
- 1/2 cup water, plus extra if needed
- 1/2 packet (25 grams) low-to-no-sugar pectin
- 1 1/2 cups sugar, divided
- Tiny dab of butter (optional: helps prevent foaming)
- Large strainer/colander + bowl to fit under it
- Cheesecloth
- Medium-sized pot
Preparation tips:
Start with putting the autumn olive berries and water in your pot, but don’t put it over the heat just yet! You need to crush your berries, first.
Get in there with your hands and squish all the berries you can: you don’t have to get all of them, but try to crush as many as possible. Squeeze fistfuls, press with your fingertips, whatever it takes to get all that fruit crushed!
Now place the pot over a burner on high heat, and bring to a boil. Once boiling, reduce the heat, and let the fruit simmer for 7-8 minutes. Stir occasionally, keeping an eye out for any whole berries. Try to squish them open against the pot when you see them.
While you’re waiting for that, prepare the colander/strainer. Place it over a large heat-safe container, and line thickly with cheesecloth- I layered mine with 1 unfolded piece at the very bottom, then put 3 more folded pieces over top.
Once the berries finish simmering and the cheesecloth’s been arranged to your satisfaction, pour the contents of the pot into your colander/strainer to drain. Leave it be at first, just letting it drip- the juice will look very odd, and somewhat off-putting- it’s not red! The red pulp will be left behind, caught by the cheesecloth, and this is good: we don’t want it in the jelly, because it will cause separation if included.
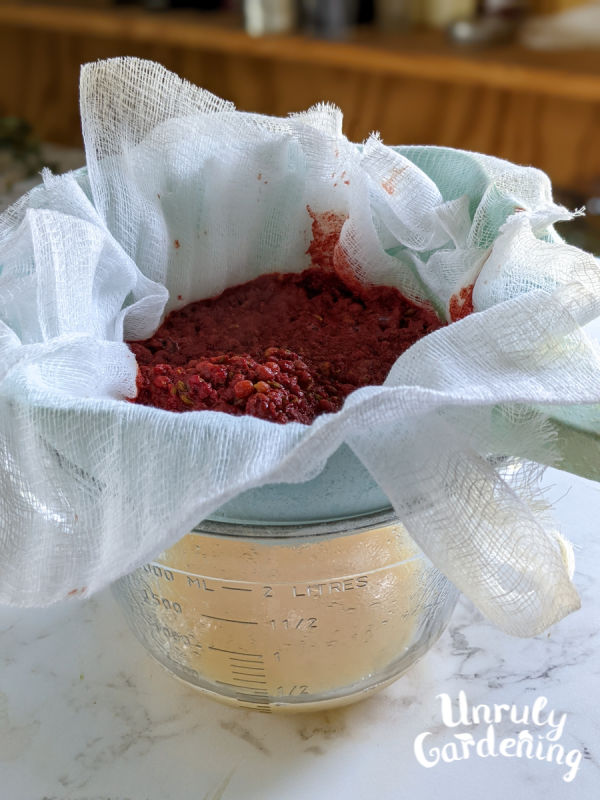
Once the fruit seems to stop dripping, carefully bundle up the pulp in the cheesecloth, and very gently squeeze every last drop of juice you can get from it. Remember not to let any red pulp come through- only the juice. Keep a careful eye on the cheesecloth as you squeeze and work it to make sure none of the pulp’s seeping through.
After all that work, depending on how juicy your berries were, you should have almost 2 cups of juice.
Add just enough water to the juice to bring that up to an even two cups.
Discard the remaining seeds and pulp. Now, on to the actual jelly!
Making the jelly:
In a small bowl, weigh out your pectin. In another bowl, measure out all your sugar, then take 1/4 of a cup out of it and add to your pectin. Set the sugar bowl aside to where it will be in easy reach.
Mix together the 1/4 cup sugar with the half packet of pectin, then add to the fruit juice, and stir until dissolved completely over a burner set to medium-high or high heat. Stirring constantly, bring to a hard, roiling boil.
What about the butter?
Add the butter if your jelly starts to foam on you- you don’t need much, not even half a teaspoon. Just put the tiniest, maybe pea-sized bit of butter into the pot, stir it in as it melts, and watch most, if not all, of your foam melt away.
Dump in the rest of the sugar all at once, and stir to dissolve. Bring it all back to a roiling boil again, and boil 1 minute.
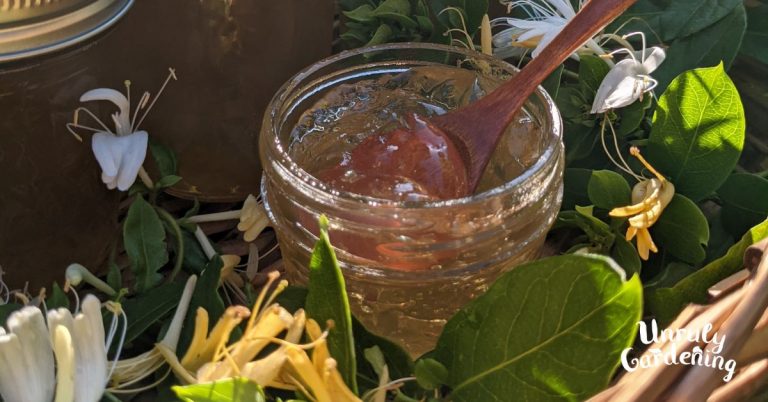
Immediately remove from heat and pour into jars. Cover with lids, and leave to set. Once cooled, secure lids completely, and store in refrigerator.
Can I water bath can this recipe?
We have not tried water bath canning this autumn olive jelly, simply because we are unsure of the levels of acidity in our recipe.
Instead, we just enjoy this small batch jelly fresh during autumn olive berry season (September and October-ish), storing it in the refrigerator and using within 2 or 3 weeks of making. Alternatively, you can tuck it in the freezer, extending its lifespan to around 6 months or longer.

Autumn Olive Berry Jelly
Equipment
- Medium Sized Heavy Pot
- Large colander or strainer
- Pyrex pitcher or bowl, to fit under colander
- Cheesecloth
- Canning jars: 3 eight-ounce jars, or 5 four-ounce jars, plus lids
Ingredients
- 4 cups autumn olive berries, without stems
- 1/2 cup water, plus extra as needed
- 1/2 packet low to no sugar pectin (25 grams)
- 1 1/2 cups sugar, divided
- 1/4 tsp butter, optional – to reduce foaming
Instructions
To make the juice:
- Place the autumn olive berries and water in a medium pot.
- Using your hands, squish as many berries as you can to help the fruit get crushed.
- Place the pot over high heat and bring to a boil.
- Once boiling, reduce heat and simmer for 7 to 8 minutes.
- Stir occasionally while boiling, and attempt to crush any whole berries you spot, using the back of a spatula against the sides of the pot.
- While the berries boil, prepare the colander by thickly lining it with cheesecloth. We use one unfolded piece in the bottom of the colander, and 3 folded pieces on top.
- After the berries have simmered, pour the contents of the pot through the cheesecloth lined strainer, into the Pyrex pitcher or bowl below.
- Let drip until cool enough to handle.
- Red pulp will be left in the cheesecloth-lined colander, while a beige juice will drip into the bowl or pitcher below.
- Once the fruit stops dripping, bundle up the pulp in the cheesecloth and squeeze all of the juice from the pulp.
- Be careful not to let any red pulp squeeze into the juice. The pulp will separate from the juice when turned into jelly if that happens.
- Add enough water to the resulting juice so that you have 2 cups of liquid total.
To make the jelly:
- Prepare the jars by running them through a sanitize dishwasher cycle, or boiling them in a pot of water for 10 minutes, then keeping them in the hot water until needed.
- Add the 2 cups of berry juice to the pot.
- In a small bowl, combine 1/4 cup of sugar with the 1/2 pack (25 grams) of low or no sugar pectin.
- Stir the pectin/sugar mixture into the berry juice.
- Place the remaining 1 1/4 cup sugar near the stove, so you can grab it easily when needed.
- Place the pot of juice over a burner turned to medium-high or high heat.
- Stir constantly until a hard rolling boil is reached.
- If the jelly starts to foam, optionally add the 1/4 tsp butter to help reduce or eliminate the foam.
- Once boiling, dump all of the sugar in at once, and stir to dissolve.
- Return the berry juice to a full boil, and boil for 1 minute.
- Immediately remove from heat and pour into the hot jars. You may find it easier to pour the liquid jelly from the pot into a 4 cup Pyrex measuring cup first, to make pouring into the jars easier.
- Cover with lids and leave at room temperature until cool.
- Store in your refrigerator for 2 to 3 weeks. Jelly can also be frozen for about 6 months, though sometimes the texture may change.

My strained juice is pink on the bottom and beige about half way up is it ok to proceed
Hi Diana! I think it should be fine to proceed, as long as you don’t have pulp mixed into your juice.
Even then it would be fine to eat – it’s just that the pulp causes separation in your jelly which isn’t visually appealing.
my favorite autumn olive jelly recipe! made last year for the first time, brought a full mason jar and cornbread to a weekend long potluck and it was such a hit the jar was entirely empty! I love the sour citrus flavor mix with sweet, perfect for a sour candy lover like me 🙂 just made this year’s first batch and I’m so happy I found your recipe again. thanks for sharing!
Hi Anya, So happy to hear that you like the recipe & that your potluck friends enjoyed it too!
Thanks for leaving a comment & review! 🙂
Delicious! Once Google lens identified the berries I was looking at, a search brought me here. I live in Lorton VA, and found the autumn berry bushes around a field. I appreciate all of the ways you helped ID the bush (beyond google). I admit I added some red gel food coloring to make the beige more appealing. Worth the effort & can’t wait for next year’s free crop!
Hi Dave, So happy you like the jelly recipe! Thanks for the comment & review!
Yes, it can be water bathed. 15 minutes for pints, 10 minutes for half pints. I added a splash of lemon juice, juice to make sure it’s acidic enough. Sets quickly with the lemon juice added. Yummy!
So happy to hear you like the recipe!
Thanks for the review & comments! 🙂
Your article did not mention Russian Olive, or how to tell them apart from Autumn olive. Is there a difference?
Hi Gail! Yes, Russian Olive is a different plant with different features, though the fruit is also edible. We don’t have Russian Olive growing around here to write a comparison up about them, but here’s a good little video clip I found:
(It’s from TikTok but you don’t have to have an account to view it – I don’t have one and could watch it just fine.) 🙂
https://www.tiktok.com/@orionaon/video/7292257774359072042